Tuesday, January 22, 2013

Conjunction of the Moon and Jupiter, January 21, 2013

These photos were taken around 7:30pm when the Moon was still approaching Jupiter - so they weren't exactly at their closest point, but the weather was already turning sour so I had to go early. Snow flurries were rushing in from the NW, and I had to wait to get shots between the clouds. We're currently under a wind advisory (20 mph with gusts up to 35 mph), so the 10°F temperature feels like -8°F.

The first image shows the moon and Jupiter over-exposed through thin clouds, taken at 300mm, ISO 200, 1 sec, f/5.6. It was quite an eerie sight!

jupiter moon conjunction single exposure


When the clouds parted, I was able to grab two photos for a clean composite image. The moon was shot at 300mm, ISO 1600, 1/4000 sec, f/5.6; and Jupiter was shot in the same position at 1/200 sec.

jupiter moon composite photo


I also got a wide angle shot at 18mm, ISO 400, 25 sec, f/4.5 which includes a radiant lens flare from the bright moonlight.

wide angle jupiter moon conjunctioniphone weather screenshot


I was out for about 20 minutes total and couldn't feel my fingers as I was packing up my gear and rushing back into my apartment. Less than ideal conditions, but at least I got a couple cool shots. I couldn't let this event pass me by - I knew I'd be jealous of everyone's pics on Instagram!

Monday, January 21, 2013

How to Photograph the Moon on an iPhone using Exposure Lock

The best way to photograph the moon using an iPhone is to lock the exposure on something bright before going outside. Since posting "How to photograph the moon on an iPhone: One possible solution" I've come across a more straightforward technique described below.

Update: For more advanced iPhone photographers, check out "Most Detailed iPhone Photo of the Moon Possible"

The moon is a very bright object, which is why it normally looks like a washed-out white dot using an iPhone camera. Even using a DSLR, the only way to get detail on the face of the moon is to treat it like the bright object that it is by using a low ISO and fast shutter speed.

Because the iPhone camera doesn't include settings to manually adjust ISO and shutter speed, you have to trick the camera into the right settings on something other than the moon.

Update: New apps in the upgraded version of iOS now allow you to adjust the ISO manually! Finally! 


The app Manual - custom exposure camera is a good example of one of these apps.


moon photo with iphone
Difference between iPhone camera auto exposure on the moon, and locked exposure

1. Locking the Exposure

iphone camera focus and exposure lockBefore going outside to take a photo of the moon, hold your iPhone up to something bright. I used the light in my kitchen. Holding it directly up to the light will let you lock the exposure for anything bright (probably better for full moon), or holding it slightly further away or at an angle will let you lock the exposure for a dimmer moon (such as crescent or clouded moon).

Basically, you're using a bright light as a stand in for the moon so that you can adjust the camera settings. The moon is just too small in the sky for the camera to adjust the exposure appropriately - I think the iPhone uses more of the field of view to determine when to adjust the settings, and the moon is a very small area in the field. I've even tried locking the focus and exposure on the moon outside, but it just doesn't trip the settings like a light that fills up more of the viewfinder.

Tap and hold the screen area to lock the focus and exposure (AE/AF Lock).

Note: AE/AF Lock comes with the iPhone 4S and 5, and I believe was added to the iPhone 4 after the iOS 5 update - but I don't have every version of the iPhone to test this so I'm going on what I've read.


2. Use an App that Shows ISO and Shutter Speed

The default iPhone camera has the ability to lock auto focus and exposure, but we want to lock the exposure without locking the focus. A number of camera apps will let you do this, my favorite so far is 645 Pro (). This app lets you lock exposure and focus independently, and shows the ISO and shutter speed values on the screen.

iphone camera exposure lock
Exposure lock (AE-L) on kitchen light at ISO 50, shutter speed 1/742 seconds
Apps that tell you the ISO and shutter speed will let you practice with different values to get a better moon photo. With the default camera, you'll be left guessing exactly what settings you're using.


3. Focus on the Moon

With the exposure locked using the kitchen light as an under-study, we're ready for the star of the show to make her appearance. Go outside and focus on the moon. I used a DIY $1 tripod to try to hold the phone still, but at shutter speeds faster than 1/500 second you might get by with just a steady hand. Thar she blows! The moon is in my crosshairs.

Thar she blows! The moon is in my sights

4. Lower Your Expectations

Even with an appropriately-exposed photo and the super nice iPhone 5 camera, the moon will only appear about 50 pixels across in your final shot. I know, it stinks, but it's better than a big bright ball of nothing. You can actually see some of the details on the face of the moon, and you did it on your PHONE! That's pretty cool!

Looks like a kidney bean!

Here's another I took using the app Night Cap (), allowing for a slightly longer shutter (1/257 sec) also at ISO 50. I also used a tripod on this one, which helps squeeze any last details out of the tiny moon.

Crop at 100%, photo from iPhone with Night Cap app, ISO 50, 1/257 sec
Progressive zoom/crop of full moon 1-26-2013 using Night Cap app

Goodbye orange glow! Is this cheating?

The more I learn about astrophotography, the more I realize that really amazing images are very rarely published straight out of a camera. Finding out the Orion Nebula looks like a gray green blob even through a high power telescope is sorta like finding out there is no Tooth Fairy (spoiler alert?).

But, where the magic fades, my appreciation for the work increases. Brilliant photos take time and skill, and I guess I'm becoming more comfortable with manipulating images to represent reality using some "little white lie" Photoshopping.

Now that the curtain has been pulled back, it seems less dishonest to kill the orange glow of the rural suburbs to more closely represent the sky how I perceive it in person. See below:

night sky over bowling green ohio
25 sec at ISO 800 shows lots of orange glow straight from the camera

photoshop color adjust night sky
Same image adjusted in Photoshop to match what I saw in person - is this cheating?

Which of these is more authentic? The one that I didn't touch (but the light pollution junked up), or the one that looks more like what I really saw (but didn't have the ability to capture).

Friday, January 18, 2013

My first Andromeda in spite of the waxing gibbous

Although the nearly-half moon was in the same general vicinity as the Andromeda Galaxy, I couldn't pass up the first clear night in a week. I wanted to test my deep sky stacking abilities with a new target (I get the feeling my Orion Nebula posts are getting a bit tired).

I want to try re-stacking my batch with some different parameters, and I'll eventually re-shoot Andromeda without the Moon glaring at me.

I created this image with 318 subs, 30 darks, and 30 bias frames in Deep Sky Stacker (DSS). Total exposure time 7 min 45 sec.

andromeda galaxy 300mm lens
318 light frames, ISO 1600, 300mm, 1.6 sec each, stacked in DSS, adjusted in Photoshop
andromeda
Labeled version of the same picture above
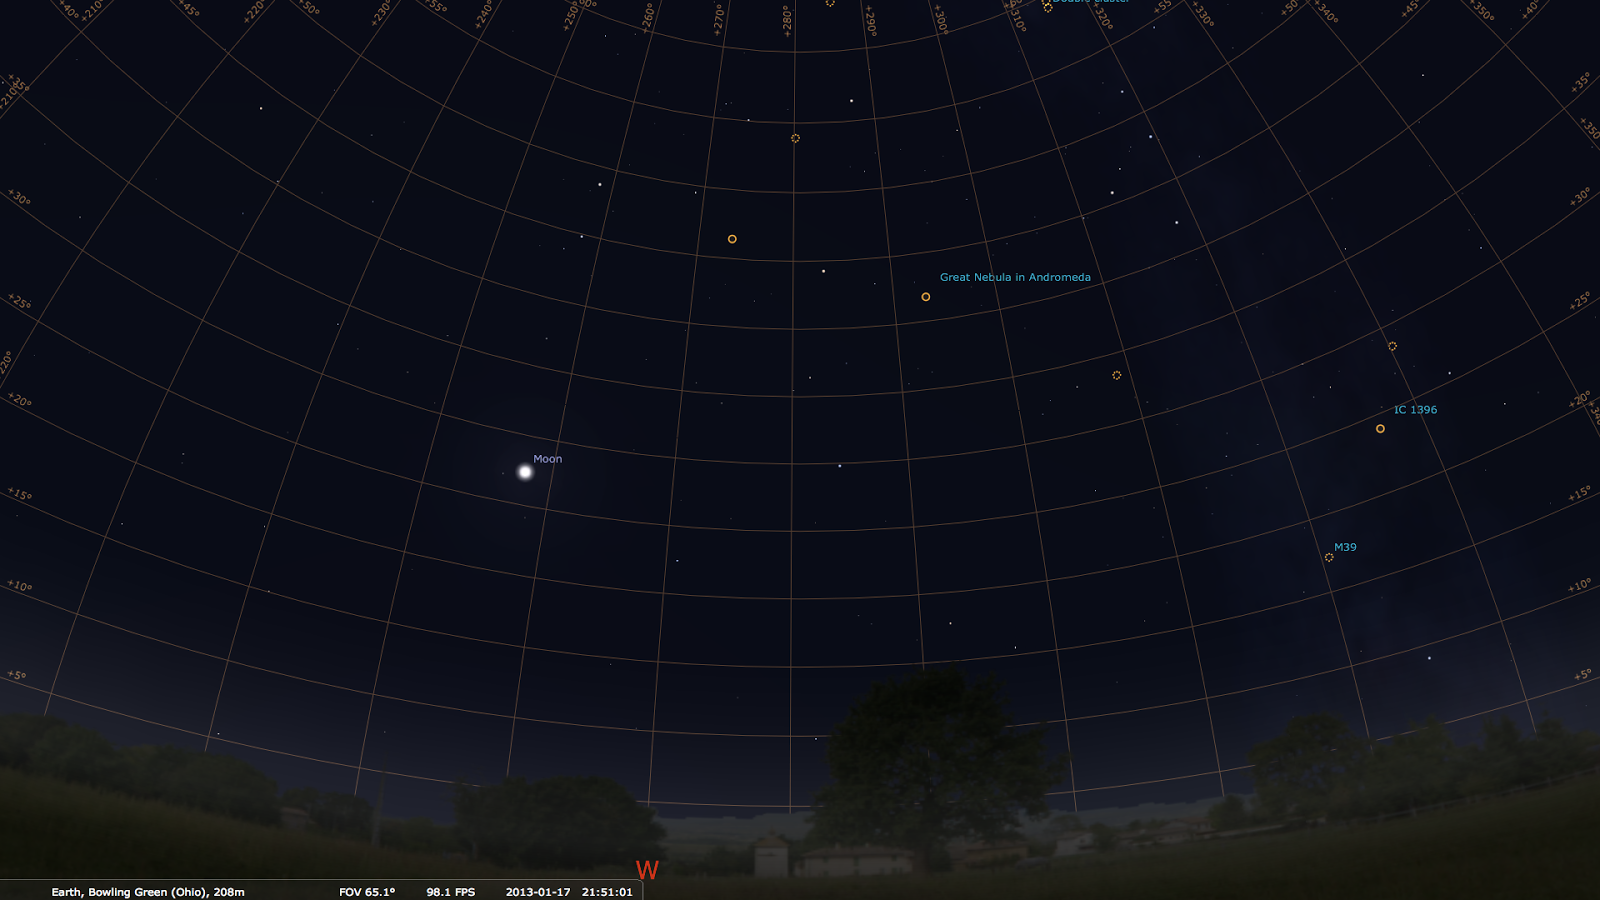
stellarium view of andromeda to the west
Planning my shot earlier last night, view generated in Stellarium

The hardest part was FINDING the faint gray blur in the sky in the first place! I turned my shutter speed down to 8 seconds to try to find a smear in the general area where I thought it would be. Nothing. Next I tried going from landmark to landmark - leapfrogging from the Moon to surrounding stars to the general area where I thought it should be.

300mm, 8 sec at ISO 1600 used to locate Andromeda for the first time

I saw a rusty orange smear on the 8 sec exposure. Having never seen Andromeda "in person" before, I had to assume that this was the real thing. 300+ exposures later, manually tracking using the visible stars as a reference, I stacked my batch and came out with something pretty cool (for a newbie). Next time finding it should be a breeze. It's fun knowing that I know where to look, or that I could show off by pointing it out to someone :)

I get a little blown away thinking about the light coming from ANOTHER GALAXY and landing in the back of my camera in the courtyard of my apartment complex - and the light that must surely be landing on me as well. It's kinda spiritual in an atheist way.

Update 1-21-2013: I did another pass at stacking in DSS and used Median Kappa Sigma (whatever that is!). I wanted to see if there was any more data hiding in there, so I really blasted it out with levels and contrast. I think dust trails are slightly more visible. I think this set is about maxed out, I need to try again from a darker sky and shoot for 400 subs.

andromeda
Re-stacked same image set, blasted out the levels and contrast in Photoshop

Take Star Photos and Make Star Trails Using iPhone 5

Finally, a way to take star photos and make cool star trail images using your iPhone. This will take true iPhone astronomy and astrophotography to the next level! I learned about a new app called "Night Modes" from Steve Owens' Dark Sky Diary blog. The app takes advantage of the iPhone 5's improvements in low-light, and includes up to 1 second true exposure time (not just simulated exposures). The app promises "15 times more light gathering capability compared to the Camera app!" Night Modes ().

Update: Take even longer iPhone star trails using Night Cap with infinite interval photos

star trails on iphone
Proof of concept: 29 stacked images, each at 1 sec, ISO 3200, only using iPhone for photos, stacked photos using StarStaX software
stars and jupiter photo on iphone
Single exposure with iPhone 5 using Night Modes app

You have to keep the camera very still while using the app, because the autofocus is delayed by the long shutter. I recommend using a tripod and the headphone volume shutter button, but you can also set the phone on the ground and walk away because the app includes a timer up to 10 seconds.

iphone star circles
66 stacked images over a 20 minute period using unmodified iPhone as the camera

I'm not usually the type to make excuses, but the severe wind advisory could be a reason why my star trail lines aren't smooth.

starstax screenshot
Screen shot of the images loaded into free StarStaX software

Here is a look at my set up:

iphone tripod
Using the headphone shutter (+) volume remote, I manually took 29 shots

iphone shutter release
iPhone headphone (+) volume button works as a shutter release

tripod mount for iphone
Simple binder clip holds the iPhone in position

tripod mount for iphone
Bent binder clip with a little athletic tape to prevent scratches