Showing posts with label deep sky. Show all posts

Tuesday, April 19, 2016

70-200mm f/2.8 Same Lens for Sport Photography and Whirlpool Galaxy

I'm so pleased the same lenses work out well for both sport photography and night sky photography, because those are the two kinds of photography I like to do. Recently, I was able to double dip a rental from BorrowLenses.com. I had been thinking about borrowing a lens for a while, but I didn't like the idea of possibly booking something and having overcast skies.

Side note: Use this referral link to get $20 off at BorrowLenses.com when you spend $99+ and I'll also earn $20 off my next rental, it's a win-win!

I finally pulled the trigger when I had the opportunity to do some basketball photography to help out Campus Recreation with their intramural championships - so I had a specific date and time that my lens would be needed, and then I would just hope for clear skies sometime within that same week.

I went with the Canon 70-200 f/2.8 without image stabilization (to save a buck), I got the protection plan and it came to about $100 after shipping.

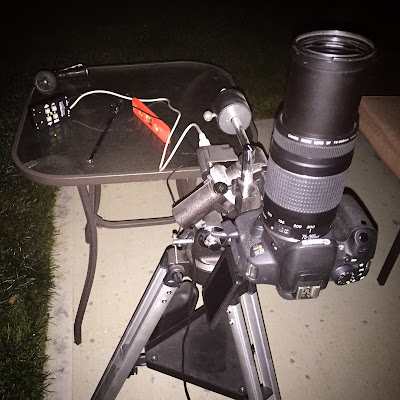
canon 70-200 on telescope mountcanon 70-200 on telescope mount


Turns out I had excellent night sky conditions all week long, but I was so swamped at work I only got out one night. It also turns out that this time of year is great for basketball championships but not so great for bright deep sky objects. Orion sets right after sunset, and Andromeda isn't very high by sunrise. I'd have to find a suitable target, but more on that later...

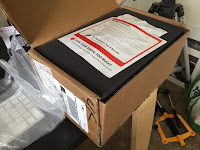
My lens arrived right on schedule and was in a sturdy box. I learned I was supposed to send it back in the same box at the end of the week, and it came with a UPS shipping label inside for the return trip.

borrow lens package70-200 lens on tripod

Get $20 off at BorrowLenses.com with this referral link if you spend $99+ and I'll also get $20 off my next rental :) k thanks now back to the blog post!

This lens took a little getting used to - first of all, the casing is a fixed dimension so all the zooming happens inside the structure. Okay I probably could have described that better. There's no big long thing that comes out when you zoom in, it stays the same size. The lens was so heavy duty it came with a tripod collar to mount it over the center of gravity.

large lens hood
Lens hood, not only does it make the lens look even bigger and super sweet, it also helped keep away the dew a bit longer for night sky photos

canon ef 70-200

canon uv filter
UV filter - still not sure how to use these things

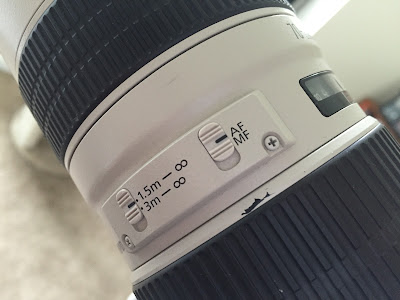
canon 1.5m to infinity switch
I had to look up the 1.5m to infinity and 3m to infinity switch on the lens. It helps you focus faster if you tell the lens that you never expect your subject to be closer than 3 meters.
When I was doing indoor sport photography, at first I wasn't all that impressed. My LCD preview looked okay, and I still had to crank the ISO up to 800-1600 range to get a fast enough shot. This seemed slightly annoying since I paid $100 just to have a faster lens. Then when I compared the photos to my pics from last year, there was no comparison. It was CLEARLY better, and I must have remembered incorrectly because my photos from last year had tons of grain and maxed out ISO at 6400 and even 12800.

f/2.8 sport photography
Canon T5i single frame f/2.8, 1/640 sec, 100mm, ISO 1600

basketball foul
Canon T5i single frame f/2.8, 1/640 sec, 100mm, ISO 1600

basketball creative commons
Canon T5i single frame f/2.8, 1/640 sec, 70mm, ISO 1600

slam dunk creative commons
Canon T5i single frame f/2.8, 1/640 sec, 98mm, ISO 1600
So I took 1700 photos and ended up with 200 or so pretty cool shots, and maybe 10 'wow' shots. It's my annual sport photography crash course haha, but it's fun. The students love feeling like all-stars and I think they set the pics as their Facebook profile photos for a while.

Okay, let's go from the indoor basketball arena to the night sky - can the Canon 70-200mm f/2.8 do both? In short, yes.

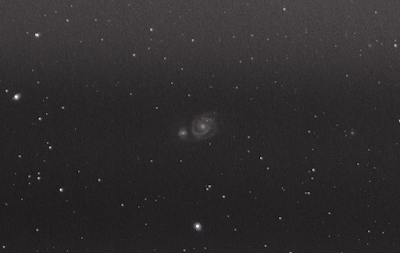
It took a while to find a target, but after seeing the Whirlpool Galaxy (M51) at 200mm, I realized it was large enough to actually see and would be a fun deep sky object to try, although I'd never imaged it before.

It was very easy to locate, to the right of famous double star Mizar and Alcor in the handle of the Big Dipper rising in the east. Like I said, not much else was up this time of the year within reach of my lens.
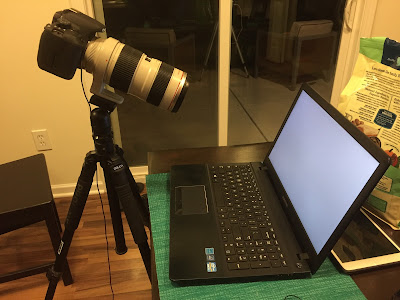
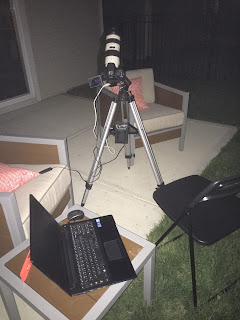
take flat frames with monitor
I actually took flat frames! That's how you can tell I really tried on this one...
m51 whirlpool galaxy dslr 200mm
Canon T5i stack of 145 sub, 30 dark, 26 bias, 15 flats at ISO 800, 200mm, 13 sec, f/2.8
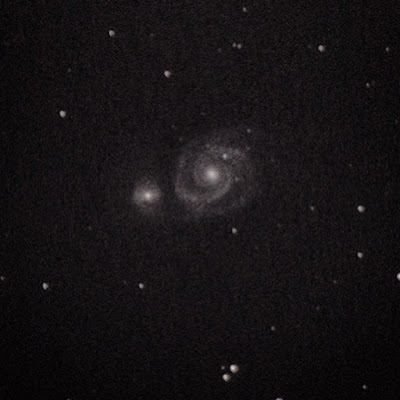
m51 whirlpool galaxy dslr
Tight crop of above photo edited in Instagram (contrast, structure, sharpness)
Quick side note here about flat frames, this lens produced a really weird gradient pattern that was horizontal bars instead of a circular hot spot in the center. Is that weird?

flat frame
Flat frame from 70-200 f/2.8 lens looks weird. Also, see the image above, Deep Sky Stacker didn't really remove the gradient bars even with these flats, so what gives?

Wednesday, November 4, 2015

Canon DSLR Astrophotography: Andromeda Galaxy Improvements

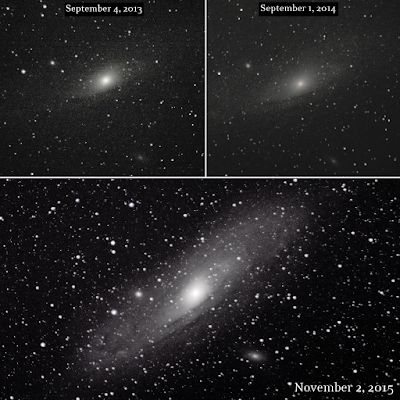
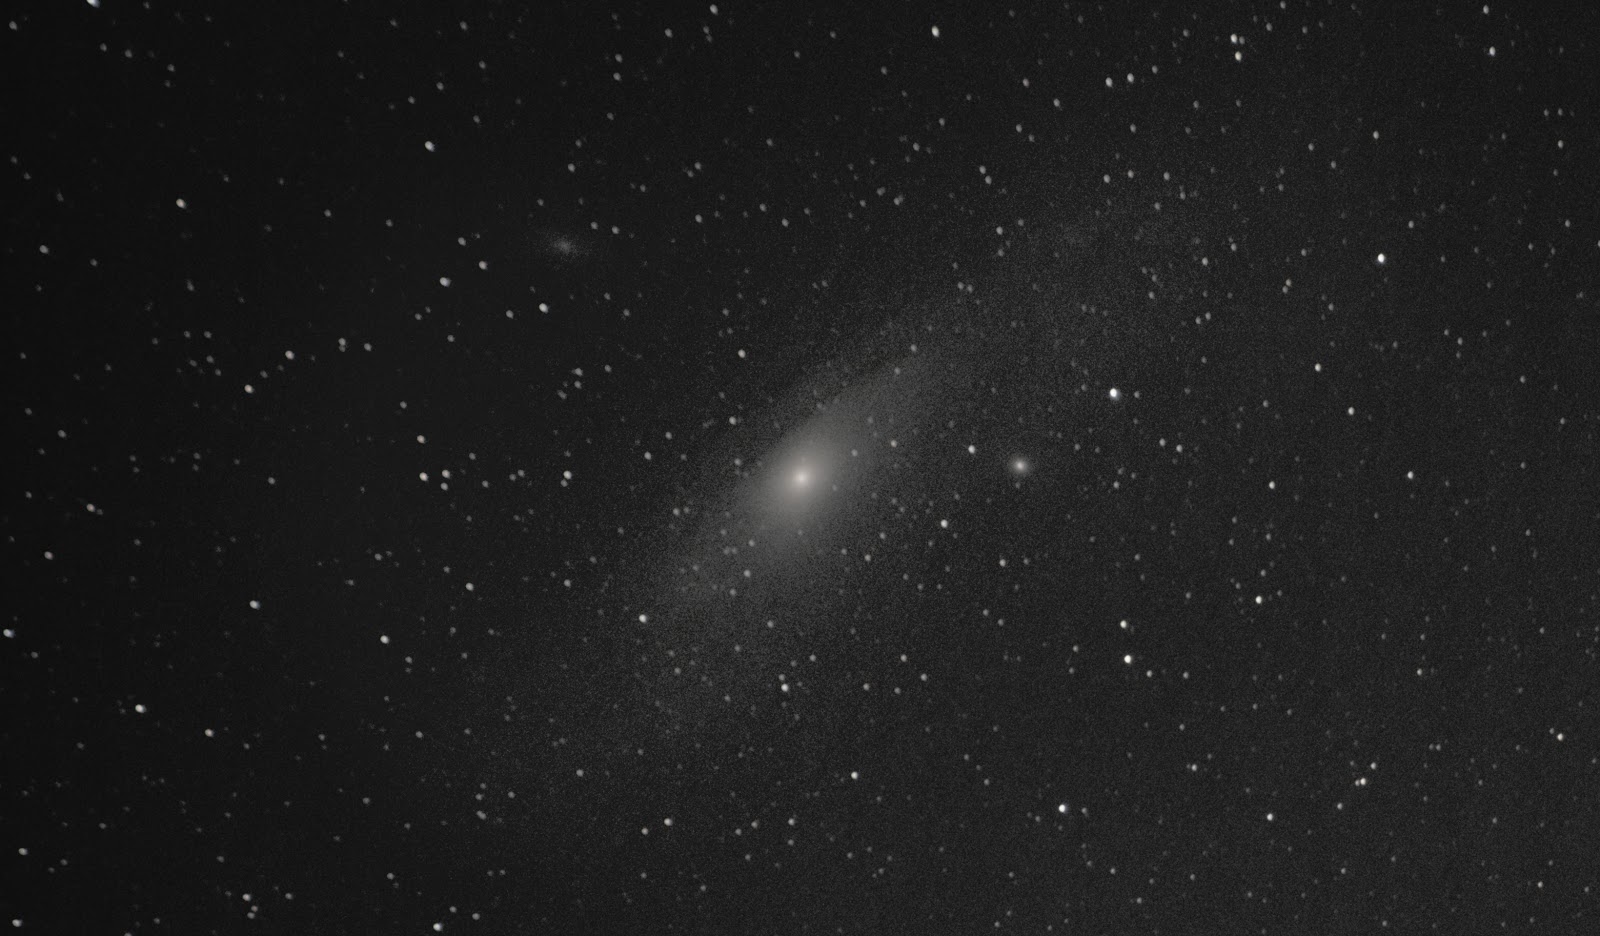
The last time I tried to image the Andromeda Galaxy (M31), I was still just testing out my Orion EQ-1 mount and trying to learn how to align and how it all worked. That time I only took 9 light frames and got my (at the time) best image stacked. Just 9 frames! That shows the benefit of the motor-driven mount for sure. But since then my Canon DSLR astrophotography has gotten a little better.

After I learned the mount a little, I imaged the Orion Nebula (every beginner's favorite target I'm pretty sure), but didn't go back to Andromeda.... UNTIL NOW! Last night I did a proper treatment of M31 high in the sky directly overhead and with very favorable conditions. Here's how it went down.

Canon DSLR astrophotography
Sometimes you don't realize how far you've come until you look back.

I aligned slightly to the bottom left of Polaris. Without cross hairs or a finder scope, I'm really just aiming at the center focal point through the viewfinder and hoping for an approximate alignment. I think my best is about 20 seconds, but that night I got 13 seconds without star trails. Not great, but not bad for a simple motor. I bumped it a few times and I'm sure I knocked it out of focus a bit, especially with this lens that seems to jump if you touch it.

Next I had to find Andromeda, but since it was directly overhead, I couldn't do my usual technique of star hopping through the viewfinder. In fact, I couldn't even get my head under the viewfinder. I pulled out the folding screen (this thing has saved my butt a few times) and just started firing off test shots in the general direction. It only took me 16 shots to find the fuzzy blob and then I zeroed in on it.

Canon DSLR astrophotography
Canon T5i on Orion EQ-1 motorized mount (single speed, no tracking)
canon DSLR on motor tripod mount
If it looks awkward, that's because it was! I couldn't even see through the viewfinder, I had to just guess and click around for a little while to find my target.
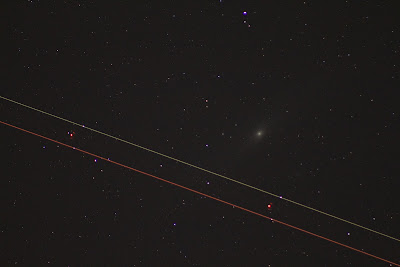
I wanted to at least give M31 equal treatment compared to my Orion shot that I love so much, so I let it click away for about 30 minutes doing 160 or so 13 second exposures. Individual frames look like this one (although not all have an airplane buzzing the fuzzy galaxy blob). Quite a close approach considering the field of view is around 5 degrees.

andromeda airplane
One of the frames I had to throw out, but kind of a unique image that shows what Andromeda looks like in a single 13 second exposure, and a near miss from an airplane. 

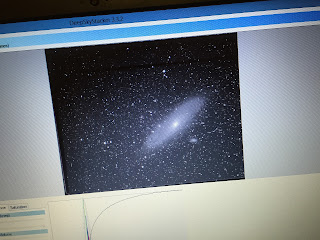
The first thing I did after stacking in DSS (total exposure time 31 min 24 sec) was to crank the curves all the way up just to see what might be hiding in there. I don't use this as a final product, but it is a quick way to see what to shoot for in Photoshop teasing it out bit by bit with curves to avoid the grain of this rough pass. This also proves that I'm not just drawing an oval around the center and turning up the brightness! It really is that bright compared to the surrounding sky. It looks like I just drew a ring around it, but that's really the galaxy itself!

canon dslr andromeda galaxy
Cranked the curves all the way up in DSS just to get an idea of what might be hiding in the pixels. It's too grainy to use, but gives me something to shoot for in Photoshop where I have to tease it out bit by bit to avoid the quick-and-dirty grain from the DSS pass at it.
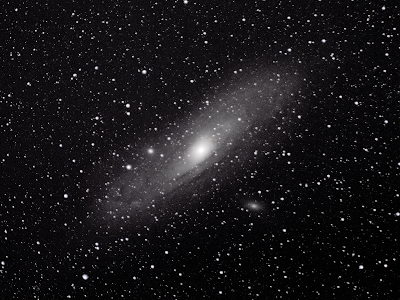
I'm a little rusty at deep sky stuff. I used curves in Photoshop to tease out the contrast between the dust trails and the brighter parts. I spent about 2 hours on it. My best Andromeda Galaxy (M31) by far! I'm a little rusty on the post processing, but the motor driven mount is night and day compared to a fixed tripod. Really pleased! Might even get a print!

canon dslr andromeda galaxy
Canon T5i on Orion EQ-1 mount, stacked in DSS, 159 subs at 13 sec, f/5.6, ISO 1600, 300mm; 27 dark frames, 24 bias, and 15 flat frames (re-used the ones from last year and they seemed to work just fine).
Take your vitamins and don't skip the flat frames! I'll never go back to not using flat frames on anything that I'm seriously trying to improve on.

Sunday, November 23, 2014

Massive Improvement in M42 with Orion EQ-1 Motor Driven Mount

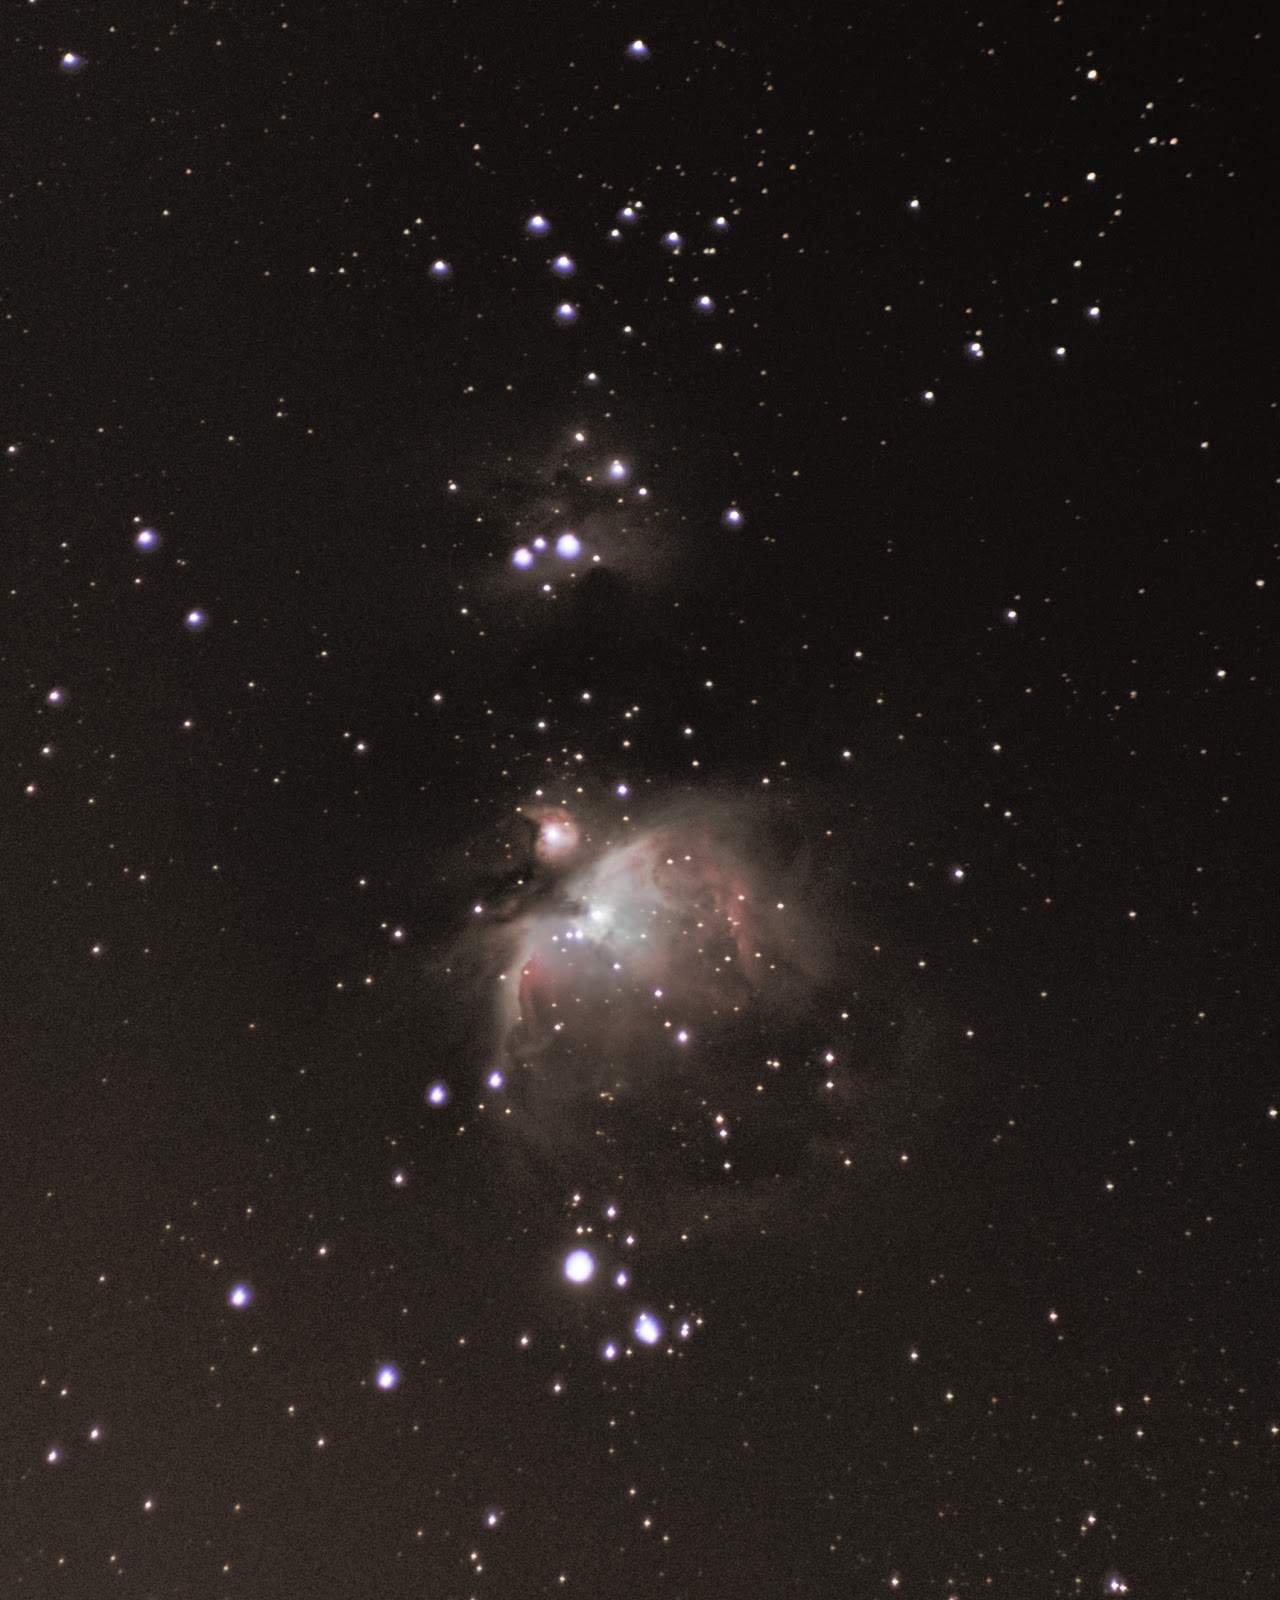
I've been making incremental improvements over the past 2 years, but this was my first time imaging the Orion Nebula (M42) with my motor driven equatorial mount. I did a quick alignment (still trying to figure that out) but was able to get up to about 13 second exposures without star trails. Here is the resulting image:

orion nebula m42 with canon t5i 300mm
Canon T5i on EQ1 mount stacked in DSS, 159 subs, 28 darks, 25 bias, 20 flats, ISO 1600, f/5.6, 300mm, 13 sec, total exposure time about 27 minutes
I did most of my curves in DSS, even though I hear doing curves in Photoshop is a lot better. I just can't get it, but I keep trying. I used Photoshop for a bit of contrast and saturation. I was so pleased with the original color that remained even after stacking in DSS.

improvement in orion m42 photography
It feels amazing to look back on my improvement over the years - I remember being excited about each of these images at one point and now they seem so basic!


I have a lot to learn in processing, but I did make some major progress using flats at my EQ mount for the first time on Orion. Yes that's right! Flat frames! I found this article by BudgetAstro to be the most helpful, because I didn't realize the goal of flat frames is to get the histogram in the middle - unlike dark frames where you just slap the lens cap on and use the exact same settings. I tried using flats before but just used the same settings like dark frames and massively over-exposed my flats, which is pretty pointless because then no gradient or vignette remains.

flat frames
Me taking flat frames in my family room, trying to get the histogram just barely to the left of center. Adjusted exposure time and kept f-number, focus, and ISO the same as my light frames.

flat frames
Tried to get the screen as close to the lens as possible, and moved it around slightly while snapping frames to try to get even lighting
I had massive hot spots in the center of my deep sky images last time, and with the flats this time I didn't have that issue with vignettes. Not saying I had a perfectly gradient-free field, but it was way better than a right gray hot spot.

More gray November skies in the forecast, maybe I'll get some more time to practice my Photoshop curves - but either way I'm extremely proud of my big leap forward in M42!

canon t5i on orion EQ1
A rather blurry shot of my setup, Canon T5i on Orion EQ-1 mount

Sunday, November 2, 2014

Deep Sky Imaging with Canon T5i on Orion EQ-1: Pleiades and North America Nebula

star trails over observation site
50 frames stacked in StarStaX each at ISO 800, 6.2mm, f/2.7, 15 sec

I set up my telescope and Canon T5i on the Orion EQ-1 mount (with motor attachment) on my back patio. It was a super clear night, and nice and dark with the exception of the waxing gibbous moon. I attempted to take a long stack of images for Andromeda, since last time was just a test with 14 light frames.

back patio observing with telescope
Patio setup, complete with candle and coffee. Tripod just barely on the patio to spot Polaris.

With my camera and tripod on the very edge of my patio, Polaris is just barely visible above the roofline. We're talking JUST BARELY - here is a photo to prove it, you can see the blurry gutter in the foreground!

polaris over roof
Polaris just barely visible over the roofline with a blurry gutter in the foreground, but I was able to keep my tripod on firm concrete without going into the yard.

I tried to slew to Andromeda and ran into a little problem. Actually I ran into the motor with this little metal pole on the side of the mount. It's the casing for the declination slow motion control screw rod thing. I messed with it for a little bit, but the cold was getting to me so I moved on to select a new target.

motor EQ-1 stuck in the way
EQ-1 motor getting in the way!

In hindsight, all I had to do is turn the declination axis around 90° to point the screw casing the other direction and let the smaller side pass by the motor. Another solution would be to spin the RA axis around the other way and turn the camera upside down - there are lots of ways to get to where you want to go on the sky but they're not always easy with a camera viewfinder.

I took stacks of both the Pleiades and the North America Nebula. the North America Nebula (NGC 7000) easy to find but tricky because it's not in my Stellarium catalogue. It's very close to Deneb (a bright star in the Summer Triangle) so in that sense it is very easy to find. I ended up using an asterism of 7 stars to help tell if I was in the right place - it's sort of like a sideways Orion right in front of the "Gulf of Mexico" part of the North America Nebula, so that's a good spot to aim for.

I had a real problem with a center hot spot in the middle, a vignette that turned the center of the image lighter gray even in the absence of actual nebula dust clouds. I tried to subtract this vignette to show what dust clouds are really there, but it's difficult to tease them apart. I need to do more of these to really up my processing skills. Really the three things that make a good deep sky photo are dark skies, good equipment, and processing skills -- if any of these is your weak link you can expect mediocre results.


north america nebula canon t5i 300mm
Canon T5i on Orion EQ-1 motorized, 154 subs, 40 darks, 90 bias, ISO 1600, f/5.6, 300mm, 15 sec, total exposure time around 40 minutes

sideways orion asterism in north america
The group of stars that helped me identify the right area near Deneb

north america nebula compare
Comparison between my image and a much nicer image by Ignacio Rico Gualda shows some faint light and dark patches around the "Gulf of Mexico" portion of the nebula, and some general-ish light patch in the middle. Just barely!

Next up, the Pleiades, "Seven Sisters," or M45. I've stacked the Pleiades before, but never really got much nebulosity. I've seen plenty of photos, always with some wispy blue clouds around the stars, but I was never sure if I really captured it or not.

The stack from last night puts that ambiguity to rest, with some clear wisps in the right places when compared to a Hubble image. I had a major problem with vignettes creating a hot spot right in the center of the frame. I tried to remove the gray circle in the middle while leaving the nebulosity, but it's a bit like throwing the baby out with the bath water.

pleiades with canon t5i 300mm
Canon T5i on Orion EQ-1 motorized, 44 subs, 40 darks, 90 bias, ISO 1600, f/5.6, 300mm, 15 sec, total exposure time around 11 minutes

pleiades with wisps
Close up crop comparing my image to a Hubble image of the Pleiades shows a couple wisps around the stars

So there you have it! Light polluted skies in Noblesville, Indiana and some free time on a Saturday night produced some pretty faint fuzzy blobs - but when you compare to the 'actual' appearance of the deep sky objects, some faint similarities do emerge. This comparison technique helped me confirm my first Milky Way capture, so I think these objects definitely count!

Sunday, September 7, 2014

Lagoon Nebula and Trifid Nebula with Canon T5i on Orion Motorized EQ-1

Lagoon Nebula and Trifid Nebula with Canon T5i
Canon T5i on Orion EQ-1M, 240 subs, 46 darks, 81 bias, ISO 800, 6 sec, f/5.6, 300mm
In spite of the waxing gibbous moon (which happened to be International Observe the Moon Night) I got a good stack for the Lagoon Nebula and Trifid Nebula. I improved on my last attempt from last summer. Previously I was restricted to 1.3 sec exposures on a fixed tripod - obviously longer exposures on my motorized mount is paying off!

This stack is a total exposure time of about 24 minutes, which is by far the longest net light exposure I've ever done.  You can clearly see the nebulosity in both nebulae. I also spent about 2 hours processing this image, and learned a new and better way to stretch curves in Photoshop rather than in Deep Sky Stacker. DSS is nice to get a rough approximation, but curves in Photoshop come out a lot smoother.

I also used my subtract Gaussian Blur technique for light pollution to remove the hot spot gradient in the middle of the image. It was a quick fix, but it did the job. I tried using a star mask without success, I guess I just don't understand how that works just yet - but the subtracted blur layer does a nice job removing gradient fuzz.

Canon T5i on Orion EQ-1M
With a 300mm lens, my DSLR on the Orion EQ-1 was pretty easy to get a BASIC alignment. I was happy that Polaris was just barely visible over the roofline from my backyard without needing to set up on the grass. I used live-view manual focus, and then loosened the thumb screws to slew all the way around to the southern sky.

I could get 6 sec exposures without star trails, which is shorter than I got the other night on Andromeda, because the stars closer to the celestial equator appear to be moving faster than stars closer to the celestial pole.

Monday, September 1, 2014

Kicking Off Andromeda Season with First Successful Motorized EQ-1 Run

I haven't done a good Andromeda attempt since 'Andromeda Season' kicked off last year in September. At that point, I made incremental baby steps to finally visualize some dark dust trails in the spiral arms of our galactic neighbor. Last year I was reaching the upper limit of what I could do with a fixed tripod - which limits me to 1.3 sec exposures at 300mm.

I got the Orion EQ-1 mount last Christmas, but I didn't really get to USE it, I did try setting it up once on my balcony but I was nervous about dropping screws through the floorboards.

I was trying to figure out how to slew the camera to the right position in the sky without unhooking and re-attaching the motor. It is delicate and uses a tiny hex screw to attach to the gear wormscrew attachment thinggy. Was I seriously expected to slew to the right spot, and then unhook the manual knob and replace it with the motor out in the field??

I avoided using it until I had my own place to really sit down and figure it out. While I was setting up last night, I noticed the thumb screws on the mount - and I tried loosening them to slew without unhooking the motor. It worked! This might seem obvious, but to a self-taught amateur this was the secret that made the setup a lot more user-friendly... I'm much more likely to use the EQ-1 mount now that I know I can leave the motor attached while I slew to the approximate location.

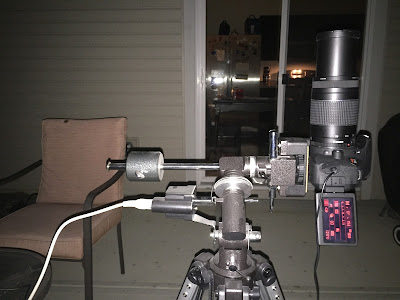
Canon DSLR camera on motorized EQ mount
Canon T5i on Orion 9011 EQ-1 Equatorial Telescope Mount

EQ motor and wormscrew
Orion 7826 EQ-1M Electronic Telescope Drive attached to the wormscrew
 
camera adapter for Orion EQ 1 mount
Camera attaches with the Orion 10103 1/4-Inch-20 Adapter for EQ1 Telescope Mount

Orion EQ thumb screw
Thumbscrew that loosens the ascension axis

Orion EQ-1M motor
EQ-1 motor driving the declination axis

EQ-1 thumb screw
Thumb screw that loosens the declination axis so you don't have to unhook the motor
I set up on the front walkway with a kitchen chair. I did a rough polar alignment - I still need to figure out a good way to align correctly with a camera since I don't have a finder scope (and really good alignment was never important before with just observing manually).

After aligning to Polaris, I loosened the thumbscrews and slewed toward Andromeda. I found it easy enough because I've been observing it for a couple years now. I did a test shot of 15 seconds at ISO 1600 and found that not only was I getting some small trails but the light pollution was washing out the photo. I pulled back to 13 seconds and the trails were insignificant. This is a pretty crappy polar alignment but WAY more light gathering potential compared to 1.3 second frames!

I took a quick stack and then noticed clouds getting in the way. I waited a little bit and then played with ISO 800 for 13 sec to see what that would look like. I took some dark and bias frames and stacked in Deep Sky Stacker this morning.

andromeda m31 with canon T5i on EQ-1 mount
Canon T5i on EQ-1 mount, 9 subs at ISO 1600, 14 subs at ISO 800, all 13 sec, f/5.6, 300mm, 21 dark frames, 21 bias frames

improvement in andromeda photo
Incremental improvement in the past year, particularly the longer exposure time reduces the grain... e.g. more 'real photo' and less computer manipulation of noise to extract the signal


Sunday, June 15, 2014

Globular Cluster M5 at 300mm with DSLR on Fixed Tripod

m5 with 300mm dslr
Stack of 141 subs, 89 darks, 77 bias, each at ISO 3200, f/5.6, 300mm, 1.3 sec
Total exposure time 3 min 2 sec, cropped

m5 with 300mm dslr
Same image as above without the label
Went out on the balcony for some observing last night at around 1:30am. I star hopped along Virgo to find the M5 globular cluster. It is rather large and bright, but unfortunately I think my 1.3 sec exposure caused star trails because M5 is close to the celestial equator and so appears to be moving faster.

This cluster brings my Messier Object total up to 64 out of 110. 

I also observed Saturn through my Meade 285 refractor and 6mm eyepiece. I could clearly see the rings, but could not identify the Cassini Division.

Sunday, May 25, 2014

M94 and M53 with DSLR for May Observing List

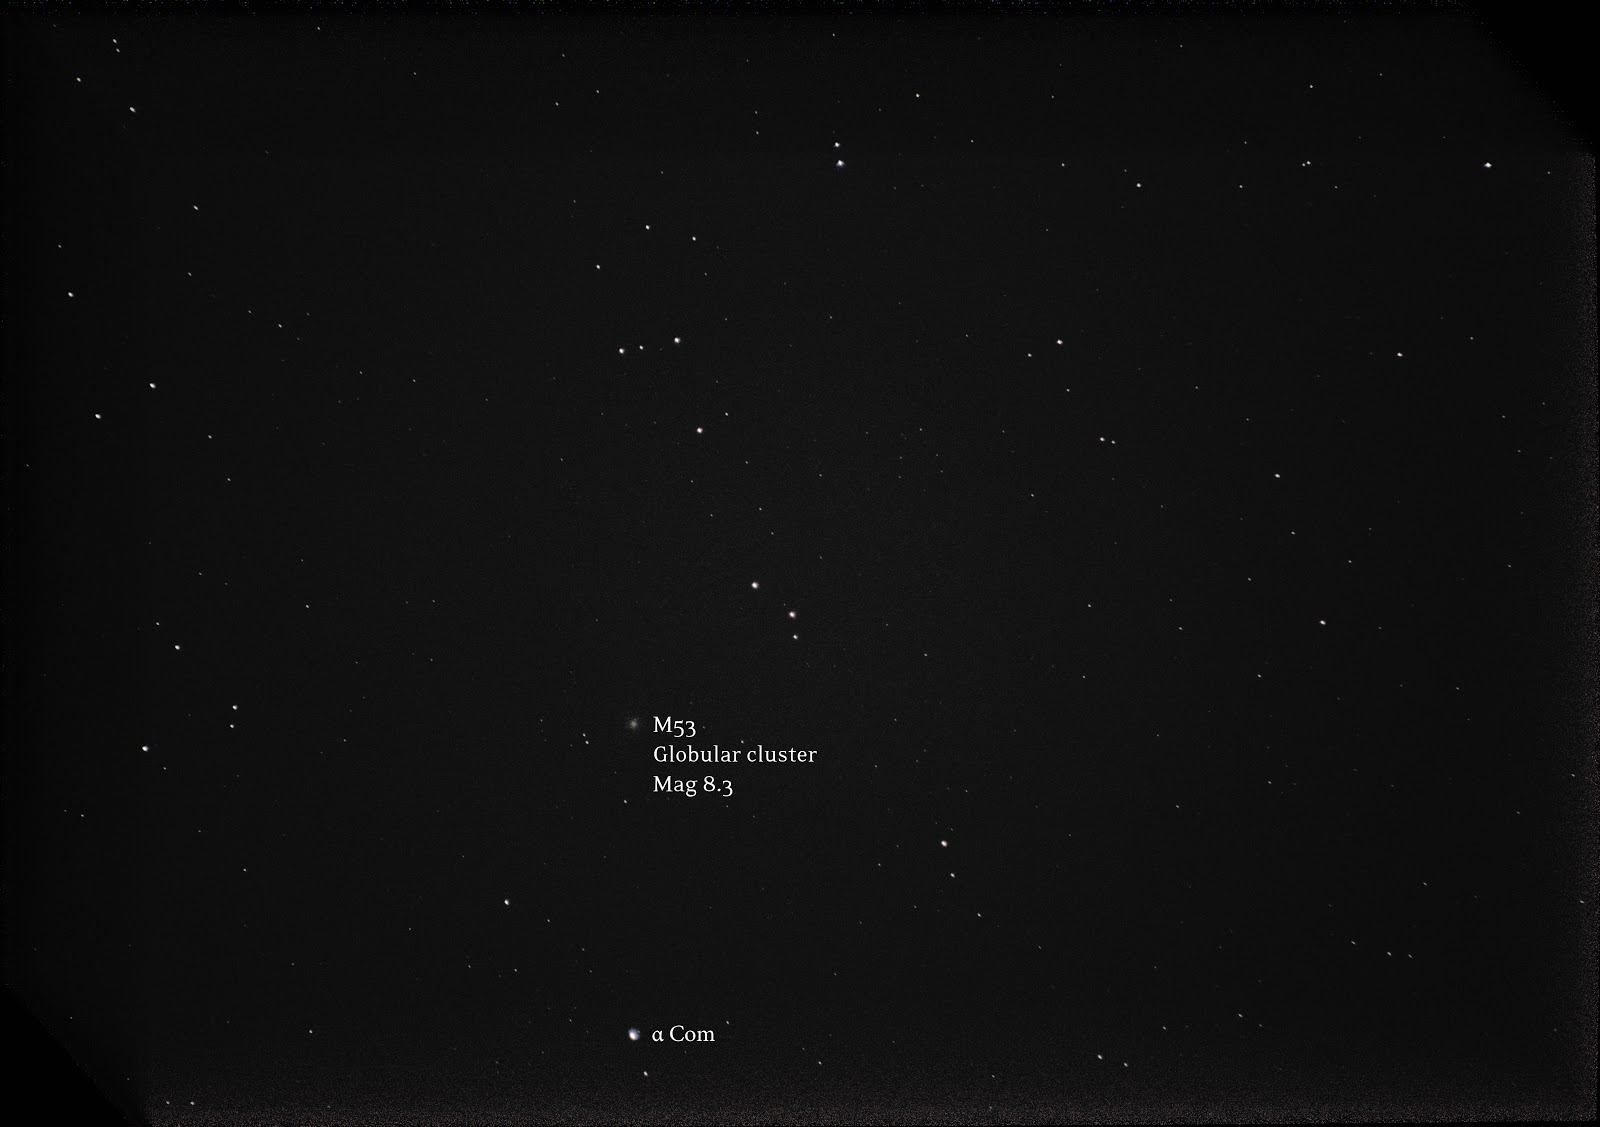
The May Observing List motivated me to catch M53 for a second time, and M94 for my first time. Just like last time, I used α Com just below M53 as an anchor star to help me compose my shot in a way that would let me take multiple photos back to back while keeping the blob in frame.

M53 messier object
1 min 22 sec total exposure, stack of 82 subs, 71 darks, 53 bias at ISO 6400, 1.3 sec, 300mm, f/5.6


M53 messier object
Original (uncropped) same as above

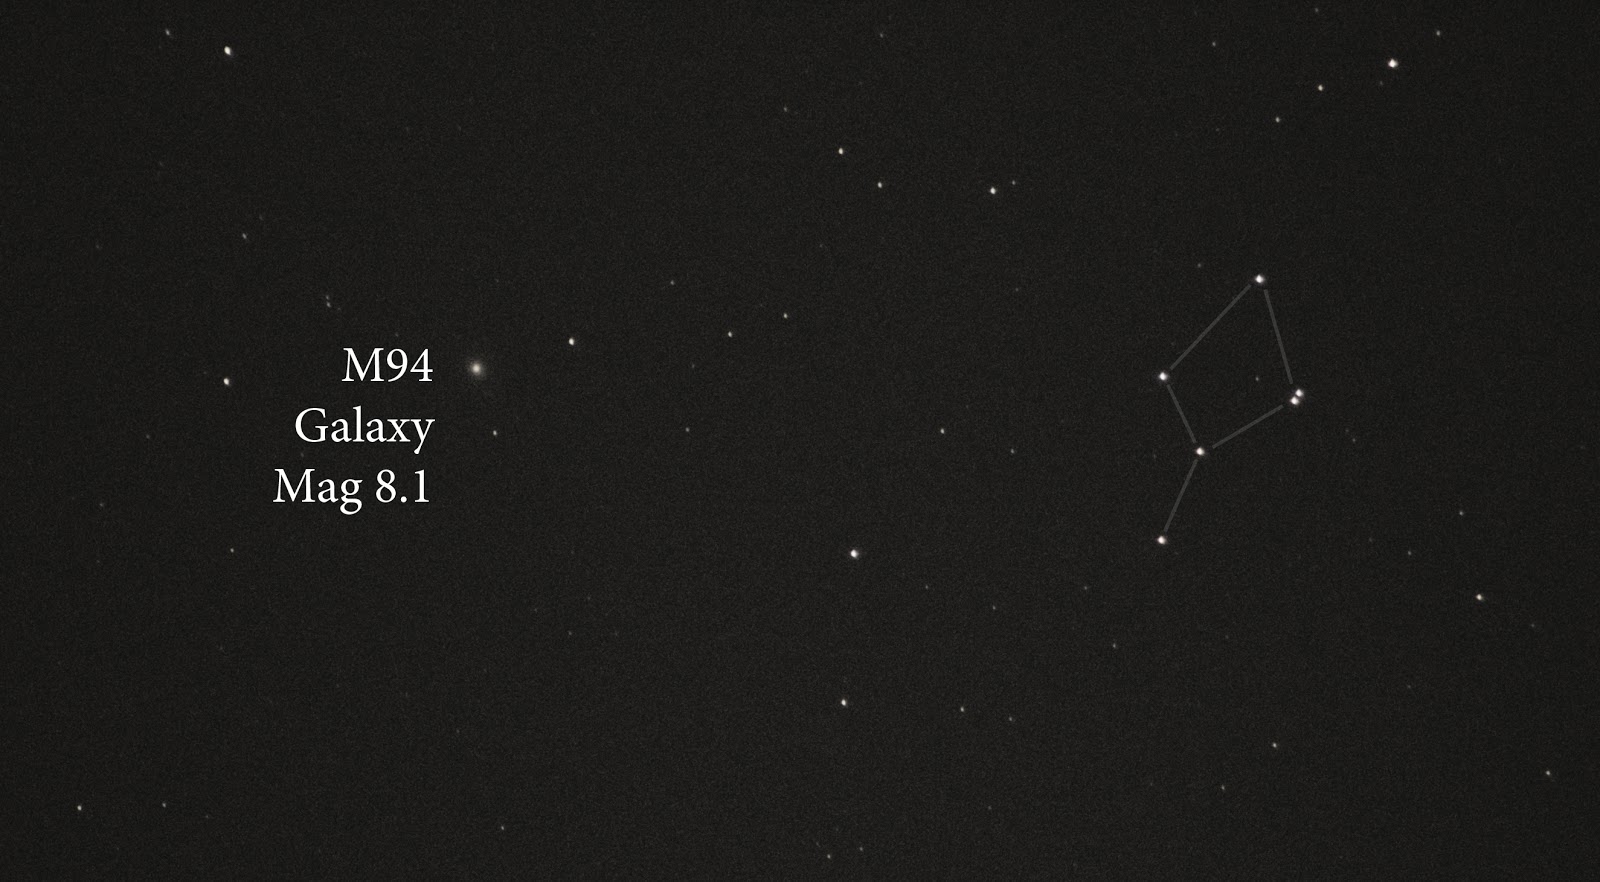
M94 was new to me, but I located it without much trouble. There is a small asterism (6 stars, each around mag 8.5) only 1° from M94 that looks like a kite or a magnifying glass. Composing my shot based on this asterism made it much easier to ensure M94 stayed in frame while taking multiple photos back to back.

M94 messier object
Stack of 195 subs, 71 darks, 53 bias, ISO 6400, 1.3 sec, 300mm, f/5.6
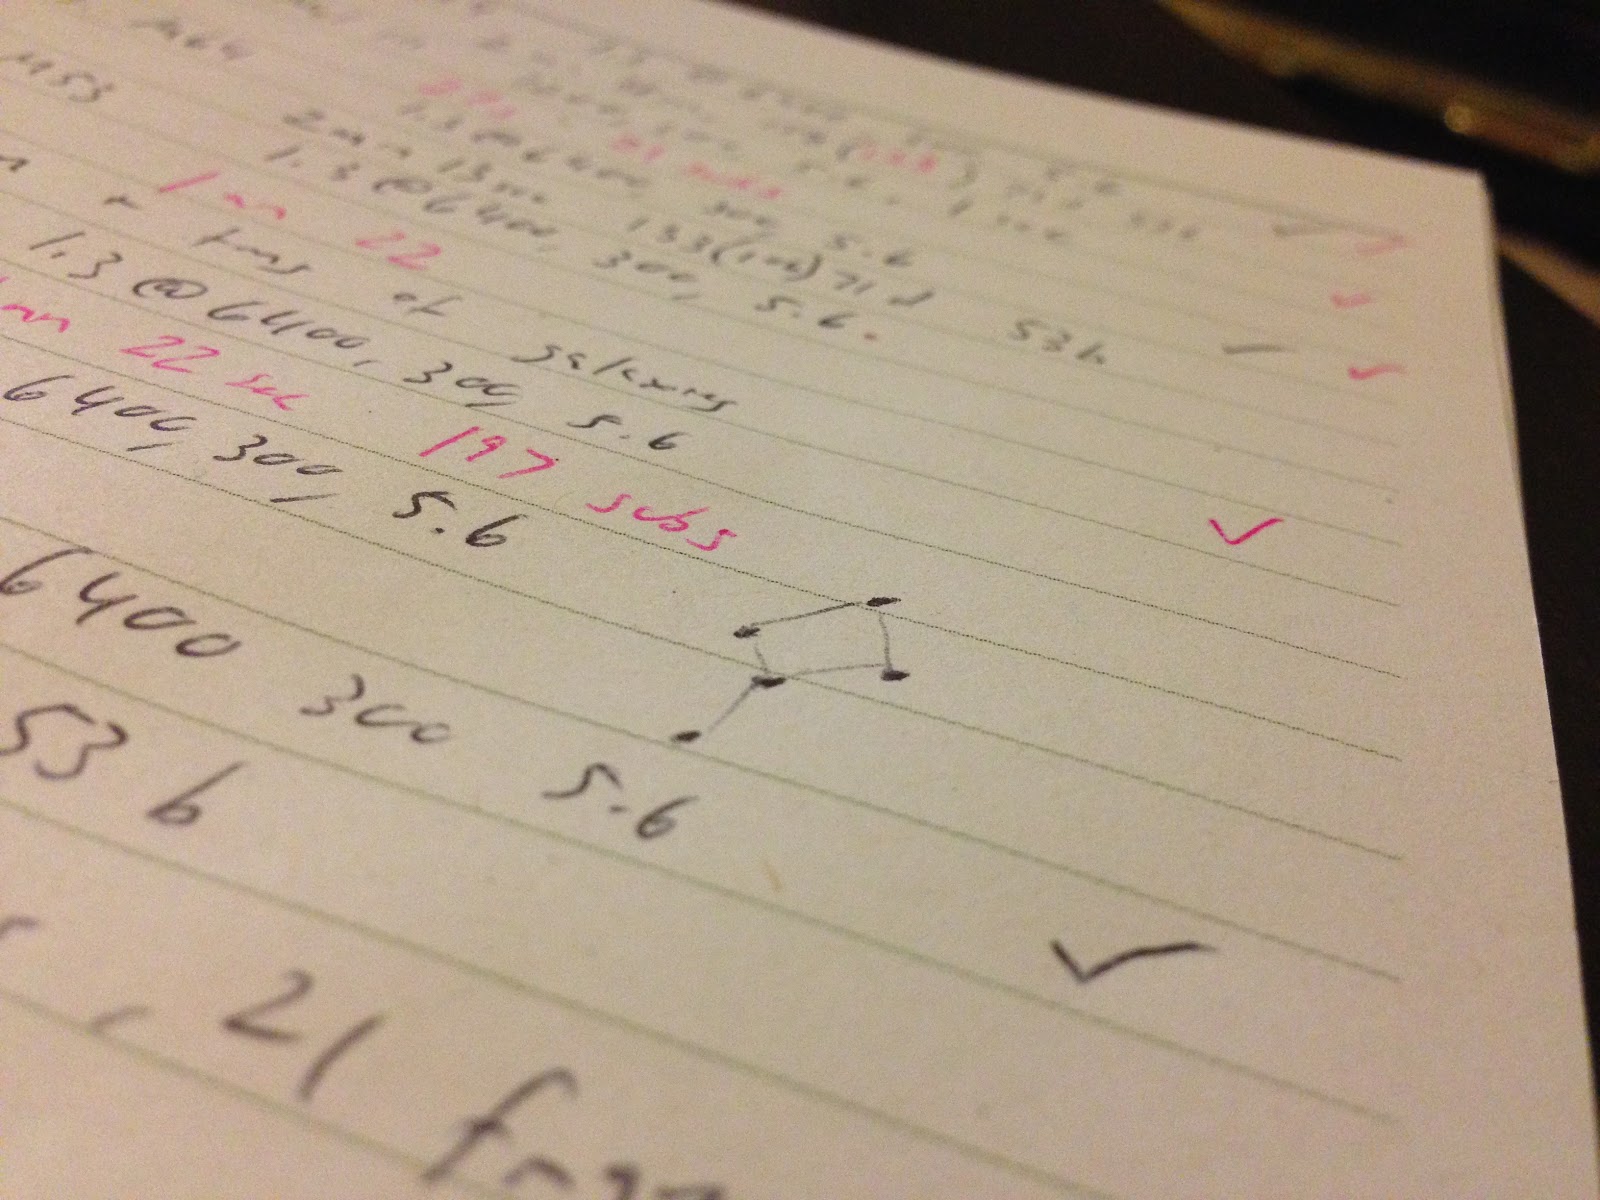
The asterism was obvious enough for me to make note of it in my observing notes, which mostly consist of acquisition settings for my DSLR. Whenever I do a bunch of Messier Objects in the same night, I can't always tell them apart until after processing - so I started writing down the order and settings for each one

asterism near M94
My asterism reminder in my observing notes

M94 brings my Messier total to 63 objects!