 |
| Progression of image processing, (1) single frame, (2) stacked processed photo, and (3) slightly blown out contrast and structure with Instagram edits |
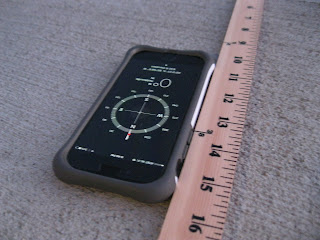
I started by doing some reading about polar alignment, and started second-guessing my procedures for trying to get aligned. I've been assuming the division in the concrete patio followed a north-south line because I assume my house faces north - but that may not be precise enough. I got my compass app out (I don't have a 'real' compass) and tried to see where true north is exactly. With the app, it's a little sticky and doesn't exactly scream precision. Nevertheless, it was enough of a difference to convince me that the concrete line shouldn't be my guide.
I took out a yard stick and a washable marker and traced a line for north. Then I moved the phone around and the compass moved slightly (ugh). So I traced this new line as well. I took the average of the two and considered it my true north. From the pictures you can tell it's slightly off from the concrete line. The concrete line is about 5º off from compass north.
After taking the light frames, I took some calibration frames. I even took flat frames, which is the photography equivalent of eating your vegetables. I still get a kick out of how dorky the camera looks starring at a blank white screen. A few years ago I would never associate these kinds of steps with better night sky photos - I figured they were all straight out of the camera with mystical amazing gear.
 |
| Using a computer screen with PowerPoint on a blank slide to create a light panel for flat frames |
When I get the images out of DeepSkyStacker (DSS) they look something like this (below), and this is actually after I do some basic curve adjustments in DSS and then transport the image over to Photoshop to continue cleaning it up.
 |
| Orion nebula stack straight out of DSS before going into Photoshop |
Speaking of faint, while I was getting my camera set up I was messing around to see what I could see and how long I could get my exposure without star trails. My EQ-1 motor is inconsistent but every now and then you get something cool. I was able to get about a 25 sec exposure of the Flame Nebula and saw it in my camera for the first time ever. I reduced my exposure down to 15 sec to take a quick stack (knowing my real target for the night was M42). I took 13 frames, 10 were usable, and ended up with something like this after stacking only subs no calibration frames.
 |
| Stack of 10 frames each at ISO 1600, 300mm, f/5.6, 15 sec |
If you use an HDR effect, my favorite happens to be Instagram's 'structure' edit feature, I know it makes it way too grainy and resizes the image, but I haven't figured out how to replicate it in Photoshop, and if you squint your eyes it really helps bring the Horsehead Nebula out. Proof! Not exactly a glamor shot, but you can tell there is a structure there. Can you see it?
 |
| Instagram HDR 'structure' edits exported to Photoshop to add dashed stroke path |


No comments:
Post a Comment