Tuesday, March 4, 2014

9% Waxing Crescent Moon Setting Over Building, March 3, 2014

Last night I watched the sunset turn into a moonset (and made a timelapse video of the sunset). Then we went to the gym, and I thought I had said goodbye to the moon for the night. When we got out of the gym, the slim 9% illuminated crescent moon was still floating over the building across the street. I've always wanted to get this "Strong" building in a photo.

crescent moon over building roof
1.3 sec, ISO 1600, 300mm, f/5.6
crescent moon over building roof
1.3 sec, ISO 1600, 180mm, f/5.0
strong moon
1.3 sec, ISO 200, 180mm, f/5.0

Sunday, March 2, 2014

Orion Nebula (M42) with Canon T5i on a Fixed Tripod

Shortly after receiving the Canon T5i for Christmas, I went out and did a series of test shots which quickly filled my smaller memory card with 18 megapixel RAW files. I was really pleased with the results, but only got 42 light frames that night. Recently, I was able to give M42 an honest attempt using the fixed tripod stacking method and my new camera with a larger memory card.

I'm still waiting for nicer weather to break out my motor driven EQ mount. I'm a little intimidated by it, and I don't want to fumble with it for the first time in freezing temperatures. So fixed tripod stacking is still the name of the game!

M42 orion nebula
M42 and M43, stack of 107 subs, 77 darks, 70 bias, ISO 3200, 300mm, f/5.6, 1.3 sec

It came out a little bright. That's the trade off I guess, I like how you can see a lot of the very faint nebulosity - making M42 look as big as I've seen it. On the other hand, the interior is over exposed and sort of washed out. I don't do enough of these to really work on my post-processing skills. All in due time!

Mini Messier Marathon with T5i and Deep Sky Stacker: M46, M47, M50, M78

On February 27, 2014 we finally had a clear night with low wind speeds, but unfortunately low temperatures to go along with it. I have been slacking on the February observing list, and haven't felt like going out into the field next to my apartment. It's been too cold, too snowy, and when the snow finally melted it revealed all the dog duty in the lawn that our neighbors I guess didn't feel like picking up because the snow conveniently covered it up - out of sight out of mind. Let's just say it's not the place you want to be walking in the dark.

I also realized, after filming shots of campus for a work-related video that my camera is extremely shaky at 300mm. I guess I knew this on some level, but until you really see the amount of vibration you don't really realize it. I recorded video at 300mm and could only use a clip of 2 seconds out of a 30 second clip. This would explain my fuzzy moon, and might be due to the fact that the T5i is lighter weight than the XT. Or perhaps the wind has been picking up in January and February so far this year.

Ok I've been rambling enough, on to some photos. I shot these from my balcony out of the wind and stepped inside to stay warm while the shutter remote allowed the camera to rattle off plenty of frames. I am really enjoying this beefy 64GB memory card!

M46 and M47 messier 46 messier 47
M46 and M47, stack of 60 subs, 77 darks, 70 bias, ISO 3200, 300mm, f/5.6, 1.3 sec

M50 messier 50
M50, stack of 60 subs, 77 darks, 70 bias, ISO 3200, 300mm, f/5.6, 1.3 sec

M78 Messier 78
M78, stack of 109 subs, 77 darks, 70 bias, ISO 3200, 300mm, f/5.6, 1.3 sec

Whew! Quite the productive night! All of these are new to me, so I get to check them off my Messier Object list - and M50 was on the February observing list, so I get to check that off as well!

How to Remove Light Pollution from Star Photos with Gaussian Blur Layer

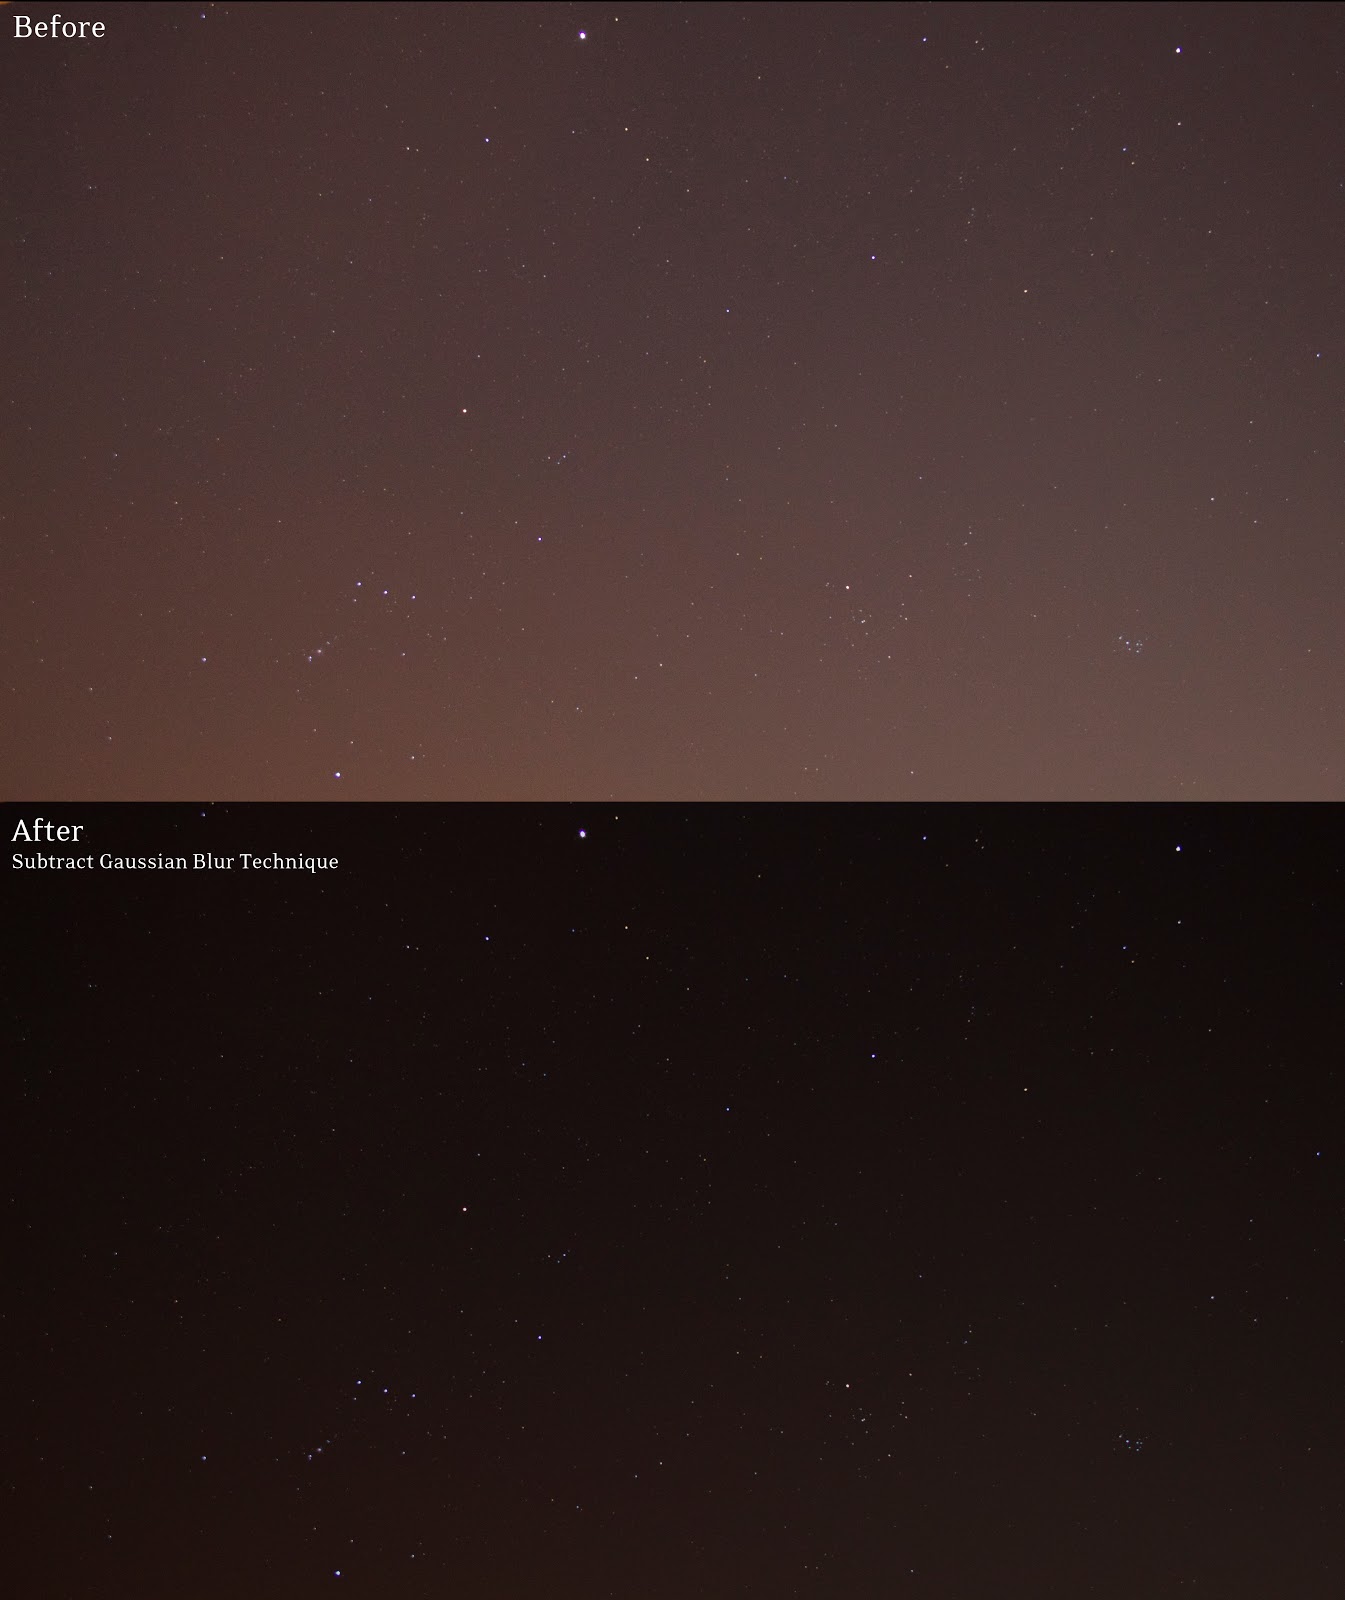
I posted a before and after pic on Instagram that shows a new technique I just learned for removing light pollution by subtracting a Gaussian Blur layer in Photoshop. Based on the comments, it sounds like others - like myself - hadn't tried this technique yet. So I decided to post a sort of screenshot walkthrough for the technique (because everybody hates reading).

Remove Light Pollution from Star Photos
Before and After - original photo is ISO 1600, 18mm, f/4, 10 sec from outside Indianapolis

Remove Light Pollution from Star Photos
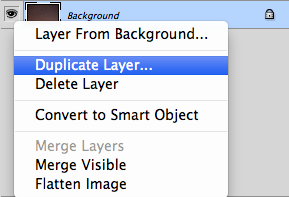
When you open the image it will be the background layer in Photoshop. Duplicate the background layer and name it whatever you want, then make sure this new layer is on top of the background layer.

Remove Light Pollution from Star Photos
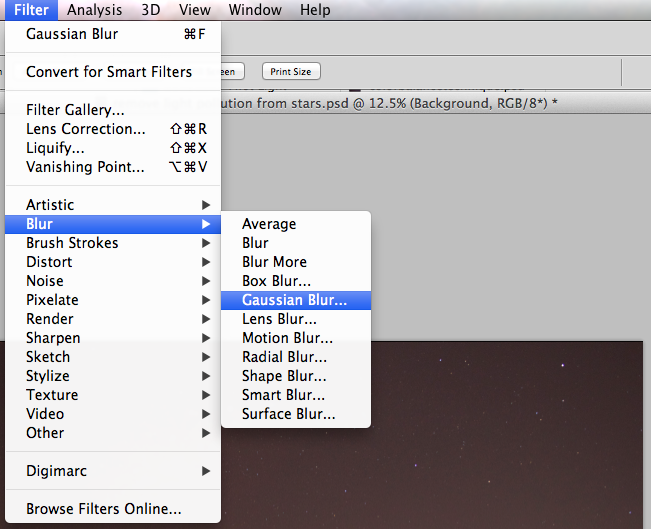
Apply a Gaussian Blur effect to the new top layer...

Remove Light Pollution from Star Photos
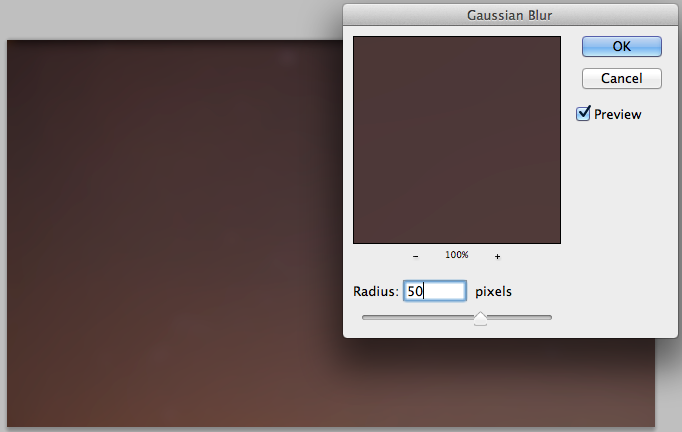
Blur out all the stars, this is typically in the radius 40 to 60 range...

Remove Light Pollution from Star Photos
Choose either Subtract or Difference from the drop down tab, then adjust the Opacity to remove as much of the light pollution color from the photo as you want. 

Your end result will have a lot less light pollution. You may need to increase brightness on the bottom layer. Play around with the settings to your liking, but this should get you pretty close!

This technique is also great for removing vignettes or gradients from photos.

It's simple and fast, and better than my OLD technique of adjusting the colors. Using the color balance approach can help you change the light pollution from an orange yellow mess to something that looks more like the sky, but it doesn't really subtract it or cancel it out. Using white balance has a similar effect, you can adjust the colors but you're not really removing any of the low contrast haze around the stars. Granted, there are some drawbacks - I haven't yet tried this technique with any objects in the foreground.

Wednesday, February 26, 2014

Earthshine 12% Crescent Moon with Venus Conjunction, February 26, 2014

Earthshine on a crescent moon is probably my favorite thing ever, and my partner Chris knows this - that's why he called me at 6:00am on his way to work to tell me about the "crescent moon with earthshine a few feet away from the planet Venus." I swear he's learning so much just by listening to me ramble.

I was super curious what he meant by "a few feet" so I decided to take Katie outside and check it out for myself. Boy was he right! There, just above a tree, was the waning 12% crescent moon about 5° from Venus. I used my fist at arms length (which approximates 10°) and decided that it was about half that distance. Looking it up on Stellarium, it's actually a bit closer, more like 4°39' separation. Very cool!

crescent moon earthshine conjunction with venus
Single exposure with white balance taken at 1.6 sec, ISO 800, 75mm, f/5.0

crescent moon earthshine conjunction with venus
Single exposure with white balance taken at 1.6 sec, ISO 800, 180mm, f/5.6

If it weren't 7°F and windy, I would probably have stayed out to watch the full sunrise with Mercury peeking above the horizon just before the sun. Because of the wind, I've learned to take a lot of frames each at the same settings. This lighter weight T5i camera is easy on the wrists for handheld shooting, but doesn't stay put in a breeze.

Here are some additional exposures of the conjunction.

crescent moon earthshine conjunction with venus
Single exposure at 1.6 sec, ISO 200, 180mm, f/5.6

crescent moon conjunction with venus
Single exposure at 1.6 sec, ISO 100, 180mm, f/5.6

crescent moon conjunction with venus
Single exposure at 1/60 sec, ISO 100, 180mm, f/5.6

crescent moon conjunction with venus
Single frame at 1.6 sec, ISO 200, 75mm, f/5.0