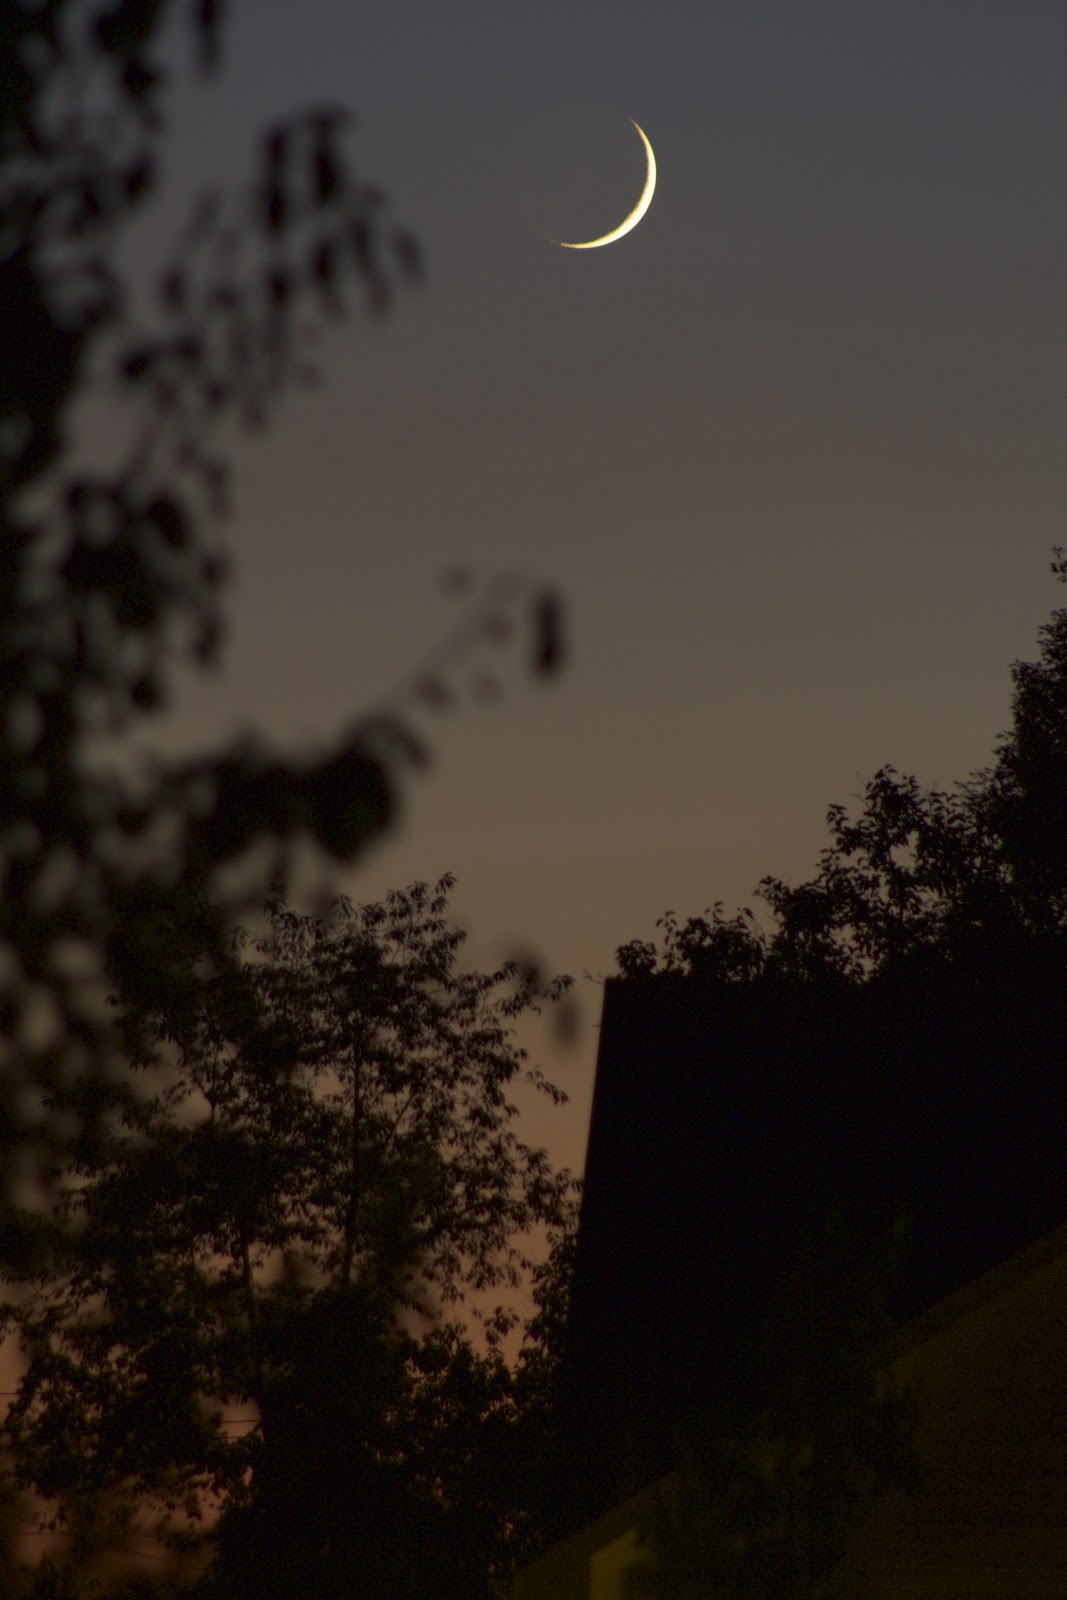
When Karin and I left Indianapolis for our solar eclipse excursion we saw the slim crescent moon just before sunrise. It was cool because it was like seeing the moon on its journey toward the sun. Now tonight I looked outside and saw the waxing crescent moon at sunset - the first crescent after the eclipse.
Waxing crescent moon, single frame Canon T5i, ISO 100, 120mm, f/4.5, 1/3 sec
I was supervising the dogs outside so they don't eat mushrooms growing in the mulch, and I noticed the golden crescent sliding between the houses to the West. I literally ran through my house grabbing my camera, tripod, and shutter release so I could go outside and take some quick photos. I felt re-energized. I feel like I haven't been as enthusiastic for take boring old moon photos lately, but this time felt like doing it for the first time.
Waxing crescent moon 6.4%, single frame Canon T5i, ISO 100, 230mm, f/5, 1.3 sec
I'm so glad I've had so many visitors to my blog this past couple months gearing up for the eclipse. I also got a few direct emails asking my opinion of different solar filters and eclipse glasses. It's really nice to hear from people who come check out my site!
These cool nights are nice but not quite clear enough for some deep sky photography. Since I'm limited by gear, I'm very picky about my nights - if it's going to be the one time I go out all winter it better be good! So in the meantime, I have been doing some quick captures. Here I made the most of the alignment of Venus, Mars, and the crescent moon.
The thin clouds and contrails made Venus look larger than normal, and by increasing the f-number I was able to add an interesting lens flare around the moon. It looks like an eerie sun in a dark sky. The same principle works for taking photos of Christmas lights, you can really make them pop by adding tiny lens flares around each one. You just have to increase the exposure time to let in more light, and keep the ISO low to reduce noise.
Single frame Canon T5i ISO 800, 33mm, f/7.1, 6 sec lightened in Photoshop
Here's a closer look with Mars sneaking behind the branches of my favorite river birch trees in the backyard. Venus looks huge in the haze.
Single frame Canon T5i ISO 800, 38mm, f/7.1, 6 sec lightened in Photoshop
Contrails over the moon for a hazy look, pulled back to get a little more foreground. Not much you can do with the foreground composition here in the backyard.
Single frame Canon T5i, ISO 800, 22mm, f/8, 20 sec lightened in Photoshop
Single frame Canon T5i, ISO 800, 22mm, f/9, 20 sec with porch light on
Stack of about 88 frames each at ISO 800, 22mm, f/9, 20 sec
I guess this is one of my only star trail photos with the moon in it. It's kinda neat, I normally exclude it and just focus on the stars. Just for overkill here is a timelapse of the stack:
I finally got around to stacking and adjusting my November 2016 supermoon photos that I took from my back patio through very thin clouds on November 14, 2016 about 12 hours after the peak. Since this was a "super-duper" moon, I spent a little more time trying to squeeze all the detail out of the 10 frames I took. Here is the final image, and the images I used along the way. So how do you get more detail out of moon photos without buying more expensive gear?
Final image after processing 10 frames taken with Canon T5i each at ISO 100, 300mm, f/7.1, 1/250 sec stacked in Registax, high pass layer and color correction in Photoshop
Okay so that's the final image, taken with my DSLR and a kit lens from a fixed tripod. Not too shabby! I tried to find a nice balance between bringing out the detail while avoiding the blown out HDR super high contrast artificial look that can happen if you're too eager. Nevertheless, I like a nice high pass layer with contrast and trying to bring down the noise as best I can.
Here is a walkthrough of my process with screen shotsalong the way showing how I take individual frames and capture more of the detail that is hidden in the image (while hopefully staying true to nature).
Click to enlarge - sequence of images showing incremental improvements in moon photo detail at each stage of post-processing
I love looking at sequences like these. It reminds me that the more I learn the better my images become. I can remember a time when I would have been thrilled just to have the image on the left, a moon photo using a zoom lens at 300mm. Now, as my 'eye' for moon photos is accustomed to the better quality images, the one on the left looks blurry and I would never post a single frame straight from the camera to social media. So as I learn more, each image now takes more time to process, it's not as simple as snap and go.
I'm trying not to let the term 'reader question' inflate my ego, but I did receive a Facebook message from the Philippines from someone who tracked me down from my blog to ask me a very specific question about the moon phase during a certain position. She drew diagrams on a napkin and sent them from the other side of the world, neat!
The question was: "I've been looking at the moon lately and I'm trying to solve something really important. I hope that you can help me... If the moon is waning or waxing [gibbous] in the morning, which phase has the top part left out?"
So which phase has the top part missing in the early morning as shown in her diagram? This question is sort of backwards because it's all about identifying the name (waxing or waning gibbous) rather than the position.
I don't have Stellarim on my computer at work (I decided to answer this on my lunch break) so I looked through my Star Walk app, and she also sent local times for moonrise and moonset. Here is what I came up with at the time, and then I'll expand using Stellarium to show a more accurate scene of what she was looking for...
My quick diagram to work out which moon phase she was referring to, and it's most likely waxing gibbous setting in the west in the early morning.
In short, a gibbous moon would only look like the drawing the reader provided at 2 times during the month. With the top part in shadow and the light part of the gibbous closer to the ground, it could only happen with the moon either rising or setting. Directly overhead the moon would appear to be facing sideways with the shadow part 'pointing' to the left or the right.
The moon looks exactly like her drawing when a waxing gibbous is setting and when a waning gibbous is rising.
As the moon rises and sets, the side of the moon that is the first to rise is also the first to set - in other words the 'leading edge' of the moon is first above the horizon and first below it, so the moon appears to turn in the sky, but is fixed relative to the arched pathway. If you think of a crescent moon, it will appear as a smiley face and a frowny face over the course of the same night.
Okay, so now all I had to do was figure out if she was looking at the moon rising or setting. Without knowing her cardinal directions, she did refer to 'early morning' and send along some local times. It couldn't be the waning gibbous because it only looks that way as it's rising after 9pm at night, so it must be the waxing gibbous setting in the early morning at 2:30am.
Clear as mud? Let's go to Stellarium to see if there's a simpler way to look this up. I updated my location in Stellarium to the Philippines and sure enough, the moon looks exactly like her drawing in the early morning as the waxing gibbous sets.
Waxing gibbous moon setting to the west in Stellarium
No regrets, but I did waste a lot of clear skies in November (busy with work) and now that we had our first snowfall today I'm starting to wish I had gotten out more in the slightly warmer but still very dark November nights. Okay so I guess I do have regrets.
I did manage to get out and snap a few moon photos. Nothing fancy, a few frames here and there trying to work on framing the moon with more interesting foreground objects.
Single frame from November 4, 2016 at 7:15pm with Canon T5i, ISO 100, 300mm, f/8, 1/50 sec Sharpened and colored in iPhoto
Trying to get some practice adding foreground interest in my photos, but it's hard to find suitable objects in the suburbs other than rooftops and cell towers. Also from November 4, 2016. Single frame with Canon T5i, ISO 1600, 48mm, f/8, 3.2 sec.
The full hunter's moon this weekend will put out some decidedly Fall vibes as it rises into a brisk autumn sky. With all the ambience of a pumpkin spice lattes, camp fires, corn mazes, and chilly night temperatures - I was feeling it tonight when I snapped this photo just a few minutes ago!
The hunter's moon peaks this weekend. It's currently at 97.8% full. Tomorrow (Saturday) it will be 99.9% full, and reaching perigee (closest approach) just after midnight Sat/Sun at 98.9% full - so basically a 'supermoon' if you're into that kind of stuff. According to PhotoPills it will appear 7.3% bigger than the average moon.
Single frame with Canon T5i, ISO 100, 170mm, f/8, 1/125 sec
Cheers! Go out and enjoy this perfect Fall weather and check out the hunter's moon tomorrow night!
I've been celebrating International Observe the Moon Night since 2012, and even if I don't have it marked on my calendar, I've coincidentally been observing the night sky on the observation of this day every year. I think that's the point, right? It motivates you to get out there and do some observing, or in my case astrophotography.
Tonight, I tried to do a quick prime focus shot using mirror lock up with my Canon T5i. The problem with mirror lock up is that it takes so long between frames, it confuses Registax. The good thing is that the mirror doesn't shake my telescope on this ancient (15 year old) EQ mount.
Here's my best attempt in about an hour while dinner was being made. Everything from focusing to cropping in Camera RAW, to stacking, to Photoshopping all in a short amount of time.
Canon T5i 14 frames stacked in Registax, ISO 400, 1/125 sec, prime focus Meade 285 900mm
Chris asked me, what would happen if International Observe the Moon Night fell on a new moon? Well, my guess is that it doesn't, the date seems to change to make sure that the first quarter moon is high in the sky.
InOMN is usually held in the fall, when the Moon is around first quarter. Fall in the Northern Hemisphere is generally a good time for InOMN, because of school schedules and the weather, and a first quarter Moon is visible in the afternoon and evening, a convenient time for most hosts and participants. Furthermore, the best observing is typically along the dusk/dawn terminator, where shadows are the longest, not at full Moon.
This day has only been celebrated since 2010? I say let's keep it going! Great excuse to get outside or to hold an event for the public!
I've been seeing more and more articles about this 'rare' lunar event creeping into my newsfeed. The black moon! Rare black moon this Friday! A rare lunar event is happening tomorrow! What the heck is a black moon? Is it anything like a blue moon, a supermoon, or a strawberry moon? Let me explain...
What does the rare black moon look like? Nothing!
First of all, I'm not going to do what all the otherblack moon articles do, and I'll tell you the most important piece of information first: You can't see a black moon. No really, you can't see it, it's literally not going to be visible. A black moon is the 2nd new moon in the same month, and a new moon is not observable. For all intents and purposes it might as well be invisible. Don't worry about waiting up for the rare black moon to appear because it won't.
Also, since the black moon occurs at 8:11pm ET on Friday, September 30, 2016 the moon and the sun will both be below the western horizon (at least from my location here in Indiana). For those in other areas, the new moon is always right next to the sun so you can't see it anyway.
Looking at this diagram from Stellarium, the black moon will be well below the horizon from Indiana at 8:11pm ET. In other areas, the moon will be obscured by the sun, and lit from behind so there's really nothing to see.
A new moon happens when the moon and the sun are on the same side of the earth. The far side of the moon is lit, and the side facing Earth is completely dark. Not to mention, the Moon is so close to the Sun that the light will completely obscure the moon. The only way to see a new moon from Earth is during a solar eclipse where the moon passes in front of the disc of the sun.
My rough diagram of a new moon (not even close to scale) but you get the idea
Now, the day before or the day after it might be possible to see a very very slim crescent moon, which is really cool, but this technically isn't a new moon anymore. Speaking of moon phases, check out my composite of moon phase photos that took me 3 months to photograph.
So what is a black moon anyway? Apparently it's the 2nd new moon in a calendar month (sort of like a blue moon's invisible friend). From what I can tell, it's another in a long line of terms local news anchors borrow from astrology or the Farmer's Almanac and report it as a rare celestial event - when in fact there is no such term in astronomy, nor do these events warrant special acclaim or attention.
Remember when Neil deGrasse Tyson ranted about how the Strawberry Moon is completely meaningless? In this clip from the Late Show, he admits the fun names are kind of charming, but offers an explanation of the special attention paid to not-so-special events:
"Most people want something in the sky to be special and unique to their lifetime on Earth, an Earth that has been here for 4 1/2 billion years, so this is evidence of a delusional state." Neil continues "Something can be rare but uninteresting, because of how common its rarity is."
At least with a Blue Moon or Hunter's Moon or Strawberry Moon you have something to look at! This is a new low for celebrating meaningless moon phenomena because you can't even observe it!
So there you have it! Enjoy the blackness of the night sky without light from the moon just like every other month, or any other night before the moon rises or after the moon sets.
I don't have many prime focus attempts under my belt - in fact if you search for "prime focus" on this blog, you'll only come up with 3 posts of the moon at prime focus, and a couple Jupiter, and a couple double stars. In fact, I don't believe I've even attempted the moon at prime focus since I upgraded from the Canon Rebel XT to the Canon T5i. After some major issues a while back, at least now I have my go-to prime focus attachments using a T-ring --> T-thread to .965" --> .965" threaded collar setup.
As I've noted before, the hardest part of photographing the moon at prime focus with my Meade 285 refractor is the clunky focusing wheel on the telescope. The focuser is plastic, and there is no fine focus adjustment. So, as you can imagine, when looking at the LCD screen on the back of the camera and adjusting the focus, it's nearly impossible to tell when I'm actually in focus... Whenever I touch the telescope the image jumps all over.
With all that in mind, the advantages to prime focus are that you get a much larger image (and therefore higher number of pixels in the diameter of the moon) compared to just a 300mm camera lens. Prime focus definitely has the potential upper hand, but a major handicap when it comes to focusing - whereas the camera lens has incredible hands-free focus, but the moon is only projected onto a tiny area in the center of the image sensor and thus a smaller diameter in real pixels.
I took the images below on Sunday, September 11, 2016.
Click to enlarge, prime focus vs 300mm camera lens
Now many it's not completely fair, the 300mm moon on the right is far from my best attempt. I only stacked 10 frames in Registax, which was having a rough go of it on Windows 10. When I finally got it to stack without crashing, I noticed the alignment wasn't quite right, but it still does a nice job showing the huge difference (3x the diameter) in relative size.
Stack of 10 frames, Canon T5i at 300mm, ISO 100, f/9, 1/160 sec with High Pass layer in Photoshop
Stack of 17 frames, Canon T5i prime on Meade 285, ISO 400, 1/250 sec, 900mm with High Pass layer in Photoshop and Exposure +1.0 in Adobe Camera RAW
From my perspective on the patio
During my observing session, I also saw the rings of Saturn through the Meade 285, which is always a treat - even though it is insanely frustrating to try to position this old mount that doesn't want to stay put once you have your target. I also tried several times to get my iPhone mounted on the eyepiece to take a video of Saturn, but the mount is just too finicky and shifty.
Finally, I took this quick timelapse video of my prime setup using the app Hyperlapse, which is convenient when you don't know how much you will want to end up speeding up the final video. Unlike the other timelapse apps where you have to set the speed at the beginning.
I've traveled to Washington DC four times this year for work, and I never thought I'd be doing this much traveling in my job in student affairs! I was in DC again this past week and decided to do some sight-seeing while grabbing dinner. I got a sushi burrito and water and walked over to the Washington Monument to enjoy the view as the sun set.
I knew the moon was getting fuller by the day, but I didn't realize it was the night of the full moon until I saw a bright orange sliver peeking over the clouds. Everyone around me stopped playing Pokemon GO for a minute to enjoy the bizarre and familiar sight.
Since the monument is positioned on a hill, there were plenty of great angles to view the moon juxtaposed alongside the flags and monument - but I didn't have my 'real' camera with me, so I was only able to grab this iPhone photo.
I reclined on the marble benches around the base of the monument and slowly watched the sky change colors and a few stars and planets slowly appear.
I've been slow to get around to this, after figuring out how to install EOS Utility without a CD on my laptop and realizing I could control my Canon T5i from my computer using a USB and actually shoot from my laptop. It's cloudy again tonight, but my 6 foot USB arrived in the mail so I wanted to test it out. My camera uses USB A to mini-B (not micro B like an Android phone, and not a regular B like a printer, but a mini-B).
6 foot cable lets my camera stand outside while I sit at the kitchen table
My original theory was that I would have finer control of manual focus using the EOS Utility software to make little tiny incremental changes. However, even the fine focus arrow seems to shift or stick and jump a little (could be my kit telephoto lens), but using my live focus technique I'm actually able to achieve similar results.
I think where this will really come in handy is with solar photography, because I'm unable to touch the manual focus while my DIY solar filter is over the lens. Being able to manually adjust the focus via my laptop would be a big help to focus in on those hard to see sun spots.
It's hard to tell whether or not the single frame is better than what I get with autofocus on the moon. The moon is very hard to shoot with manual focus because the craters don't give the same feedback as a star. By that I mean when you focus on a star the goal is to get the dot as small as possible to know that you are in correct focus. With the moon, there's no absolute way to tell on a tiny LCD screen on the back of the camera - so shooting the moon might actually be better with the camera paired to the laptop to look for incremental improvements.
Single frame desaturated but otherwise straight from the camera, 300mm, 1/160 sec, f/8, ISO 100
Not bad at all for a single frame, considering I was shooting between clouds too. Some better seeing and this might be a way to increase my moon quality without upping my lenses. Below is the final photo, stack of 3 frames with the usual post processing. I actually had to Google my high pass method to remind myself - has it really been that long??
I woke up to a great collection of Venus and Saturn in a fairly close pairing alongside the 7.6% crescent moon on Thursday, January 7, 2016. There wasn't much foreground scenery to speak of - just my neighbor's roofline - but the collection looked cool floating over the houses in the cool morning air. The clear sky was a welcomed sight since we've been having a very rainy winter so far.
Single frame Canon T5i, ISO 1600, 125mm, f/4.5, 2.5 sec
Single frame Canon T5i, ISO 800, 125mm, f/4.5, 2.5 sec
The bright grouping looked like a nice target to try some iPhone photos, so I got out my tripod and adapter and used both the default camera app and Night Cap Pro. Night Cap Pro is great for low light, but the moon and Venus were very bright in this shot. I do like how Night Cap Pro was able to show some scenery with the houses rather than just the moon and Venus.
iPhone 6 photo with Night Cap Pro app, ISO 2000, f/2.2, 4.2mm, 1/2 sec
This is a comparison of the DSLR photo (above) to the iPhone 6 with default camera app (bottom) at f/2.2, 4.2mm, ISO 2000, 1/15 sec showing the crescent moon with earthshine, Saturn, and Venus clearly visible.
Between the two, I like the wider photo with houses for context even though the moon isn't properly exposed and turns into a large white blob. It's kinda cool. It looks like glowing orbs, UFOs, or just a huge star above the house. I try not to post too many photos straight out of the iPhone to Instagram because I know that they're just blobs - I get it - but it's fun to play with and test out what the iPhone camera is capable of without any fancy gadgets or attachments.
We had clear skies for the Christmas full moon, incidentally the first full moon on Christmas day since 1977. Testing out two of my new Christmas presents on Christmas evening, I got this amazing universal smartphone tripod adapter mount. There are a lot of them on Amazon, it looks like some company is making them wholesale and other companies are stamping their logo on them. Either way, it's the only tripod adapter you'll need, it's so easy to pop my iPhone in and out without removing the case.
So let's check out the full moon on Christmas with both the iPhone on a tripod (with no additional lenses) compared to the Canon T5i (single frame no stacking) sent straight to my phone from the Eyefi wireless memory card.
iPhone (Left) photo with no additional lenses vs. Canon T5i (right) single frame no stacking. Both pumped up using Instagram's Structure tool and a tiny bit of contrast.
Here's a closer look at the tripod adapter. The top extends out to clip around larger phones and it has a spring in it that pulls the clamp back down for a snug grip. It's perfect for time lapses or ISS passes or anything else you need a tripod for. It's more convenient than this Glif mount because you don't have to take it out of the case.
The Eyefi wireless memory card is another cool gift I was excited about. It lets you transfer photos directly from the memory card to your phone over its own WiFi signal (you don't have to be on the internet at home, you can be in the middle of the desert).
For me, this means I can cut out the step of running to the computer to transfer images in iPhoto and then dropping them into Box just so I can tweet or Instagram something. I've done this a few times with eclipses when I wanted to share a lunar eclipse photo - I had to run in and transfer everything quick and run back out. With the Eyefi I can get the photo on my phone and cut out the middle man. I'm also looking forward to this for sports photography. I took photos of an intramural basketball championship and could have tweeted out the winners' photos right away rather than waiting.
The Eyefi memory card has its own wireless network signal it can use to transfer photos directly from your camera to your phone instantly without loading them onto a computer first.
This symbol on the back of the camera (yellow) means I'm connected to the card with my phone. It was easy to set up, the only confusing part was that it didn't work in RAW, it only connects and transfers with JPEG so it's good for quick moon photos or sporting events, but not something that will replace a stack of RAW files.
iPhone photo straight from the camera, 3x digital zoom, Manual app, iPhone 6, f/2.2, 1/670 sec, ISO 32, 4mm
Canon T5i single frame, f/5.6, 1/500 sec, ISO 100, 300mm
I saw the slim crescent moon last night as Chris and I were walking out of O'Charley's (which is a totally great and totally under-rated restaurant by the way). I looked it up on PhotoPills to see what percent illuminated it was, and it was about 5% - so now my slimmest but still worthwhile for a photo.
I made a timelapse of the moon setting behind the roof of my neighbor's house, and also pulled some individual frames out. There was some great earthshine on the dark side of the moon, and I'm glad the chimney across the way provided a little bit of foreground interest.
Single frame Canon T5i, f/9, 1 sec, ISO 1600, 205mm
Single frame Canon T5i, f/10, 1.3 sec, ISO 3200, 300mm
Single frame Canon T5i, f/9, 1.3 sec, ISO 1600, 300mm
Here are my quick total lunar eclipse photos before I go to bed, I wanted to at least get something up from my DSLR and not just photos from my iPhone taking pics of the back of the display. Here are a few keepers, and a few that set the scene.
Canon T5i, stack of 10 frames in Registax, each at 300mm, ISO 1600, f/5.6, 1 sec
(Left) Image straight from camera (Right) Resulting image after stacking and High Pass layer in Photoshop
Eclipse sequence composite! The haze kinda messes up my layout, but it's still a nice collection in spite of the clouds.
You can see how, especially with a dim subject like the fully eclipsed moon, stacking layers to reduce noise really cleans things up! I havne't done that for all my eclipse phases yet, but I wanted to get some of these posted quickly. Also, the thin layer of clouds might make it a waste to try to mess with stacking when there is already haze covering everything.
The haze did make for some interesting features, compared to the typical straight forward eclipse photos you see online.
Things were off to a rough start, and I was worried I wouldn't get to see any of the eclipse. I even put my telescope back inside and just focused on my DSLR because I knew I wouldn't have a lot of leisure time to mess around. Single shot Canon T5i, ISO 800, 75mm, f/5.6, 4 sec
This gives you an idea of just how much haze was in the sky. I could see the disc of the moon, but would I be able to see the shadow of the eclipse at all? Single shot Canon T5i, ISO 100, 300mm, f/5.6, 1/3 sec
Pretty sure this is penumbral eclipse and not just a cloud. The moon was clear of any thick clouds, and was uniformly blocked by haze, so I believe the dimming on the left is the shadow from the Earth's penumbra. Single shot Canon T5i, ISO 100, 300mm, f/5.6, 1/400 sec
Clouds moving fast creating an interesting effect around the partially eclipsed moon. At 2 sec, I should have had more blur of the moon itself, but it turned out kinda neat. Single shot Canon T5i, ISO 100, 300mm, f/5.6, 2 sec
Partial eclipse with appropriately exposed lunar surface. Single shot Canon T5i, ISO 100, 300mm, f/5.6, 1/400 sec
More cloudy halo around the moon. Single shot Canon T5i, ISO 100, 300mm, f/5.6, 1 sec
Almost total, the moon was a tiny sliver in a bizarre shape it never makes on its own going through the regular phases. Single shot Canon T5i, ISO 800, 300mm, f/5.6, 1/2 sec
Total eclipse but still rather bright on the right side. Single shot Canon T5i, ISO 800, 300mm, f/5.6, 1.3 sec